What is magnetism?
What is a magnet?
A magnet is an object made of certain materials which create a magnetic field. Every magnet has at least one north pole and one south pole. By convention, we say that the magnetic field lines leave the North end of a magnet and enter the South end of a magnet. This is an example of a magnetic dipole ("di" means two, thus two poles). If you take a bar magnet and break it into two pieces, each piece will again have a North pole and a South pole. If you take one of those pieces and break it into two, each of the smaller pieces will have a North pole and a South pole. No matter how small the pieces of the magnet become, each piece will have a North pole and a South pole. It has not been shown to be possible to end up with a single North pole or a single South pole which is a monopole ("mono" means one or single, thus one pole). http://encarta.msn.com/find/Concise.asp?ti=004AD000
History
The ancient Greeks and Chinese discovered that certain rare stones, called lodestones, were naturally magnetized. These stones could attract small pieces of iron in a magical way, and were found to always point in the same direction when allowed to swing freely suspended by a piece of string. The name comes from Magnesia, a district in Thessaly, Greece. For more history, check http://www.newi.ac.uk/BUCKLEYC/magnet.htm
Several scientists from the 1600s to today have greatly increased our understanding of magnets and their properties. Be sure to check:
http://www.worldwideschool.org/library/books/hst/biography/FaradayasaDiscoverer/toc.html
http://www.ee.umd.edu/~taylor/frame1.htm
http://www-istp.gsfc.nasa.gov/Education/whmfield.html
Ferromagnetism
When a ferromagnetic material is placed near a magnet, it will be attracted toward the region of greater magnetic field. This is what we are most familiar with when our magnet picks up a bunch of paperclips. Iron, cobalt, nickel, gadolinium, dysprosium and alloys containing these elements exhibit ferromagnetism because of the way the electron spins within one atom interact with those of nearby atoms. They will align themselves, creating magnetic domains forming a temporary magnet. If a piece of iron is placed within a strong magnetic field, the domains in line with the field will grow in size as the domains perpendicular to the field will shrink in size.
Diamagnetism ![]()
When a diamagnetic material is placed near a magnet, it will be repelled from the region of greater magnetic field, just opposite to a ferromagnetic material. It is exhibited by all common materials, but is very weak. People and frogs are diamagnetic. An interesting experiment showing this is at http://www.sci.kun.nl/hfml/froglev.html where a frog is levitated at the top of a very strong electromagnet. Metals such as bismuth, copper, gold, silver and lead, as well as many nonmetals such as graphite, water and most organic compounds are diamagnetic.
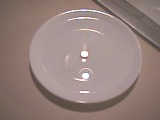
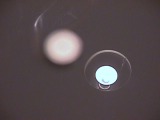

For example, here are some photos of a very strong neodymium-iron-boron magnet sitting in a dish with a shallow amount of water covering the magnet. Looking at the reflection of the light above the sink off of the surface of the water, you can see how the reflection is distorted because the water is concave just above the magnet, and flat everywhere else. (The fuzzy object in the two photos on the right is the magnet; the camera is focused on the reflected light.) This is because the magnet has pushed the water away since water is repelled by strong magnetic fields.
Also check http://www.exploratorium.edu/snacks/diamagnetism_www/index.html
Here's a fixture using diamagnetic disks that you can purchase and experiment with.
Paramagnetism
When a paramagnetic material is placed near a magnet, it will be attracted to the region of greater magnetic field, like a ferromagnetic material. The difference is that the attraction is weak. It is exhibited by materials containing transition elements, rare earth elements and actinide elements. Liquid oxygen and aluminum are examples of paramagnetic materials.
What are magnets used for?
This is a question I'll let you answer. There are hundreds and hundreds of uses which you will discover here at "Magnet Man" and in the links. Yes, some are used to hold the family's schedule and photos onto the refrigerator door, but that is just one use for magnets. Magnets were first put to use to help navigate since they would always point in a North / South direction, no matter what the weather was. Daniel Boone once said, "I can't say I was ever lost, but I was bewildered once for three days." Perhaps if he had a compass, his bewilderment would have only lasted a few hours!
For the most part, magnets are used to hold, separate, control, convey and elevate products and to convert electrical energy into mechanical energy or convert mechanical energy into electrical energy.
Some more unusual uses for magnetics are:
refrigeration (see also Patent #4107935)
bending an electron beam or proton beam in a synchrotron
 Magnets used to hold photos.
  A shop in Downtown Disney full of magnets!
Here's a list of things I've found around the house and in the car that uses magnets or electromagnets to make them work:
Around the house:Headphones
Stereo speakers
Computer speakers
Telephone receivers
Phone ringers
Microwave tubes
Doorbell ringer solenoid
Refrigerator magnets to hold things
Seal around refrigerator door
Plug-in battery eliminators
Floppy disk recording and reading head
Audio tape recording and playback head
Video tape recording and playback head
Credit card magnetic strip
TV deflection coil
TV degaussing coil
Computer monitor deflection coil
Computer hard drive recording and reading head
Dishwasher water valve solenoid
Shower curtain weights / attach to tub
Power supply transformers
Motors for use in:
CD spinner and head positioner
DVD spinner and head positioner
Audio tape transport
VHS tape transport
VHS tape loader
Microwave stirring fans
Kitchen exhaust fans
Garbage disposal motor
Dishwasher
Pump
Timer
Refrigerator
Compressor
Ice maker dumper
Sump pump
Furnace
Blower
Exhaust
Garage door opener
Clothes washer
Pump and agitator
Timer
Clothes dryer
Timer
Drum turner
Bathroom exhaust fan
Electric toothbrush
Ceiling fan
Pager or cell phone vibrator
Clocks (not the wind-up type or LCD type)
Computer
Cooling fans
Floppy disk spinner
CD spinner
DVD spinner
Hard disk spinner
Can opener
Motor
Lid holder magnet Things in the Car:
Starter motor
A/C clutch
Interior fan motor
Electric door locks
Windshield wiper motor
Electric window motor
Side-view mirror adjuster motor
CD player motor
Audio tape player motor
Audio tape recorder and playback heads
Engine speed sensors
Alternator
Starter relay
Windshield washer pump motor
Ten Facts about Magnets
(from the book Driving Force)
1. North poles point north, south poles point south.
2. Like poles repel, unlike poles attract.
3. Magnetic forces attract only magnetic materials.
4. Magnetic forces act at a distance.
5. While magnetized, temporary magnets act like permanent magnets.
6. A coil of wire with an electric current flowing through it becomes a magnet.
7. Putting iron inside a current-carrying coil increases the strength of the electromagnet.
8. A changing magnetic field induces an electric current in a conductor.
9. A charged particle experiences no magnetic force when moving parallel to a magnetic field, but when it is moving perpendicular to the field it experiences a force perpendicular to both the field and the direction of motion.
10. A current-carrying wire in a perpendicular magnetic field experiences a force in a direction perpendicular to both the wire and the field.
What types of magnets are there?
There are three main types of magnets:
Permanent magnets
Temporary magnets
Electromagnets
Permanent Magnets
Permanent magnets are those we are most familiar with, such as the magnets hanging onto our refrigerator doors. They are permanent in the sense that once they are magnetized, they retain a level of magnetism. As we will see, different types of permanent magnets have different characteristics or properties concerning how easily they can be demagnetized, how strong they can be, how their strength varies with temperature, and so on.
Temporary Magnets
Temporary magnets are those which act like a permanent magnet when they are within a strong magnetic field, but lose their magnetism when the magnetic field disappears. Examples would be paperclips and nails and other soft iron items.
Electromagnets
An electromagnet is a tightly wound helical coil of wire, usually with an iron core, which acts like a permanent magnet when current is flowing in the wire. The strength and polarity of the magnetic field created by the electromagnet are adjustable by changing the magnitude of the current flowing through the wire and by changing the direction of the current flow.
Materials used for permanent magnets
There are four classes of permanent magnets:
Neodymium Iron Boron (NdFeB or NIB)
Samarium Cobalt (SmCo)
Alnico
Ceramic or Ferrite
This table gives us some of the special characteristics of the four classes of magnets.
Br is the measure of its residual magnetic flux density in Gauss, which is the maximum flux the magnet is able to produce. ( 1Gauss is like 6.45 lines/sq in)
Hc is the measure of the coercive magnetic field strength in Oersted, or the point at which the magnet becomes demagnetized by an external field. ( 1Oersted is like 2.02 ampere-turns/inch)
BHmax is a term of overall energy density. The higher the number, the more powerful the magnet.
Tcoef of Br is the temperature coefficient of Br in terms of % per degree Centigrade. This tells you how the magnetic flux changes with respect to temperature. -0.20 means that if the temperature increases by 100 degrees Centigrade, its magnetic flux will decrease by 20%!
Tmax is the maximum temperature the magnet should be operated at. After the temperature drops below this value, it will still behave as it did before it reached that temperature (it is recoverable). (degrees Centigrade)
Tcurie is the Curie temperature at which the magnet will become demagnetized. After the temperature drops below this value, it will not behave as it did before it reached that temperature. If the magnet is heated between Tmax and Tcurie, it will recover somewhat, but not fully (it is not recoverable). (degrees Centigrade)
(please note that this data is from www.magnetsales.com)
| Material | Br | Hc | BHmax | Tcoef of Br | Tmax | Tcurie |
| NdFeB | 12,800 | 12,300 | 40 | -0.12 | 150 | 310 |
| SmCo | 10,500 | 9,200 | 26 | -0.04 | 300 | 750 |
| Alnico | 12,500 | 640 | 5.5 | -0.02 | 540 | 860 |
| Ceramic or Ferrite | 3,900 | 3,200 | 3.5 | -0.20 | 300 | 460 |
Both the Neodymium Iron Boron and the Samarium Cobalt magnets are generally known as rare earth magnets since their compounds come from the rare earth or Lanthanide series of the periodic table of the elements. They were developed in the 1970's and 1980's. As can be seen in the table, these are the strongest of the permanent magnets, and are difficult to demagnetize. However, the Tmax for NdFeB is the lowest.
Alnico is made of a compound of aluminum, nickel and cobalt. Alnico magnets were first developed in the 1940's. As can be seen in the table, this magnet is least affected by temperature, but is easily demagnetized. This is the reason why bar magnets and horseshoe magnets made of alnico will easily become demagnetized by other magnets, by dropping it, and by not storing it with a keeper. Its Tmax, though, is the highest.
Ceramic or Ferrite magnets are the most popular types of magnets available today. The flexible magnets we use are a type of ceramic magnet, with the magnetic powders fixed in a flexible binder. These were first developed in the 1960's. This is a fairly strong magnet, not as easy to demagnetize as alnico, but its magnetic strength will vary the most as its temperature changes.
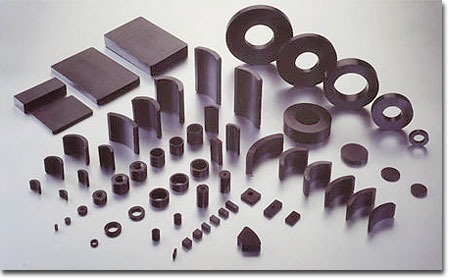
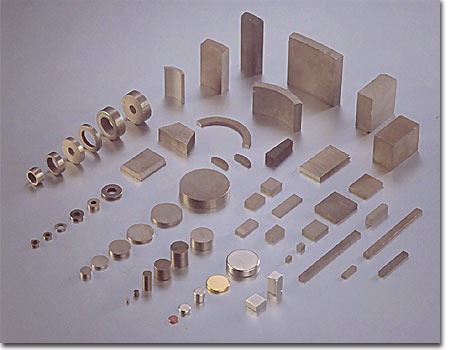
Shapes
Permanent magnets can be made in most any shape imaginable. They can be made into round bars, rectangular bars, horseshoes, rings or donuts, disks, rectangles, multi-fingered rings, and other custom shapes. Some are cast into a mold and require grinding to achieve final dimensions. Others start as a powder which is pressed into a mold or pressure bonded or sintered.
Here are some of the common types available for performing your experiments.
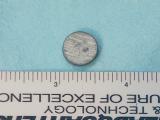 This is a small disk NIB magnet, about 0.50" diameter, 0.125" thick.
Arbor P8-1123, ScientificsOnline 35-105, AS&S , EdIn
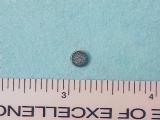 This is a very small disk NIB magnet, about 3/16" diameter, 1/32" thick, used for magnetic earrings.
Arbor, ScientificsOnline, AS&S, EdIn
 This is a larger disk NIB magnet, about 1" diameter, 0.25" thick.
Arbor , ScientificsOnline 35-107, AS&S , EdIn
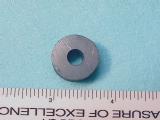
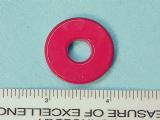 This is a small donut or ring ceramic magnet, about 1.25" OD, 0.375" ID, 0.125" thick.
Arbor , ScientificsOnline , AS&S , EdIn
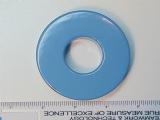 This is a large donut or ring ceramic magnet, about 2.75" OD, 1.125" ID, 0.50" thick. These have a lot of pull!
Arbor , ScientificsOnline 37-621, AS&S , EdIn
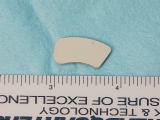 This is a kidney shaped NIB magnet, about 7/8" by 0.50", 0.10" thick.
Arbor , ScientificsOnline , AS&S 29079, EdIn M-150
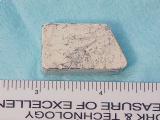 This is a trapezoidal shaped NIB magnet, about 1.25" by 0.75", 0.375" thick. These are very powerful!
Arbor , ScientificsOnline , AS&S , EdIn M-100
 These are several marble magnets, each about 0.5" diameter.
Arbor P8-1122, ScientificsOnline 34-968, AS&S , EdIn M-620
 This is a wand ceramic magnet. They are quite strong, great for experimenting.
Arbor P8-1165, ScientificsOnline , AS&S , EdIn M-510
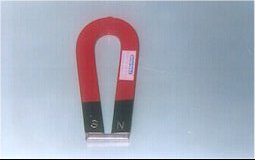
 This is a real alnico cow magnet.
Arbor , ScientificsOnline 31-101, AS&S , EdIn M-400
 These are an assembled cow magnet.
Arbor , ScientificsOnline 52-490, AS&S , EdIn M-450
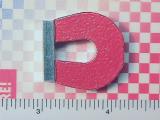 This is an alnico horseshoe magnet. Please note the keeper on the end of the magnet, which helps to prevent the magnet from becoming demagnetized.
Arbor , ScientificsOnline , AS&S , EdIn
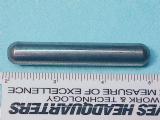
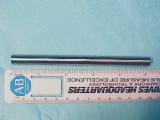 This is a long, narrow alnico bar magnet.
Arbor , ScientificsOnline , AS&S , EdIn
 This is a slightly flexible ceramic or ferrite disk magnet. Not very strong, but not likely to chip, either.
Arbor , ScientificsOnline , AS&S , EdIn
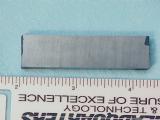 This is a ferrite bar magnet. Quite strong.
Arbor , ScientificsOnline , AS&S , EdIn
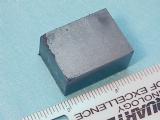 This is another ferrite bar magnet, actually, more like a block or brick! On both of these ferrite magnets, you can see little chips missing along the edges. This happens when they are allowed to come together quickly.
Arbor , ScientificsOnline , AS&S , EdIn
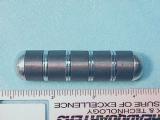
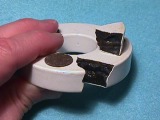
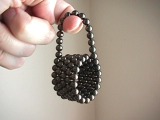 This is a string of 100 spherical magnets that stick to each other. These are a lot of fun to play with - just not good for small children. You can make a necklace, bracelet, ring, coils - all sorts of shapes. These are 1/4" in diameter, and have a black nickel finish. They were from K&J Magnetics, and cost about $60.
How are magnets made?
There are 6 basic steps to making a magnet, such as a Neodymium Iron Boron magnet = Nd2Fe14B or Nd15Fe77B8.
1. Make an alloy of iron, boron and neodymium. You will need about 0.014 pounds of boron and 0.369 pounds of neodymium for every pound of iron to make an alloy of Nd2Fe14B. This will have to be heated above 1538 degrees Centigrade to make it melt. The mixing of the materials with the iron is very important, just like thoroughly mixing the ingredients for a cake.
2. Grind the alloy into a powder. After the alloy has cooled, you will need to grind it or mill it into a very fine powder.
3. Compress the powder into a shape. Since the magnet will have a specific shape when you are done, you use a mold of that shape to make the magnet. For example, you may want a disk. Pour the powder into a mold that has a disk shape, but is also deeper than the thickness of the final part. Next, you will compress the powder with hundreds of pounds of pressure to compact the powder into a solid disk. Heat is often used to help fuse the particles together, and is called a sintered magnet. Sometimes a glue is used to help keep it all together, and is considered to be a bonded magnet. To achieve precise final dimensions, you may need to grind the part.
4. Coat the magnet. In order to improve the corrosion resistance of the magnet, the disk needs to be plated with a thin film of nickel. Sometimes a film of gold is used, or zinc, or an epoxy coating.. Nickel does not oxidize like iron, so it works great for magnets you will be touching.
5. Magnetize the magnet. All this time, the powder and the disk is not magnetized. It would be attracted to and stick to a magnet, but it would not be able to pick up a paper clip all by itself. So, it would be placed into a magnetizing fixture that has a coil of wire through which a very large pulse of current is passed for a very short period of time. The magnet has to be held in place so it doesn't shoot out and hit something or someone. It takes about a thousandth of a second to actually magnetize the magnet.
6. Pack and ship it. You now have a magnet for whatever you need. Engineers often require special shapes or specific magnetization configurations to make the product they are designing work properly. They talk with the magnet manufacturer and they determine how to best make the magnet that is needed. That's why there are so many different shapes and sizes of magnets in the catalogs.
What does the inside of a magnet look like?
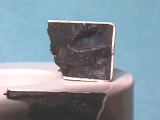
That's a great question! I have a donut or ring magnet that broke when it was dropped. I tried to glue it together with superglue, but I didn't put all of the pieces together at the same time, and now I can not fit the last piece in. (A broken bar magnet is easy to stick together while the glue is drying. Ring magnets don't want to stay together. Can you figure out why? Look at the field diagrams in the gallery.) So, now you can see what the inside looks like in the picture. The outside has a white epoxy coating. The inside is a simple dark gray or medium gray color, depending on what material it is made of. This was a ferrite magnet, so it is a dark gray color. By the way, the brownish circle on the magnet near my fingers is a felt pad I used to help prevent the magnet from crashing into another one. It didn't help much, did it? If the magnet isn't painted or coated, the inside looks just like the outside.
Magnetization configurations ![]()
How the magnet is magnetized is as important as its shape. For example, a ring magnet can be magnetized where N is on the inside and S on the outside, or N is on one edge and S on the opposite edge, or N is on the top side and S on the bottom side, or multiple N and S poles all around the outside edge, etc. A big help in visualizing how a magnet may be magnetized is by using a magnetic viewing film. Obtain one of these viewing cards, and look at the magnets you have around your house. The white line marks the boundary between the N and S poles. Make a sketch of what each magnet looks like under the viewing film. You will be surprised by some.
Here is a great site that has drawings of several popular magnetization configurations.
What affects the strength of a magnet?
Material
As seen in the previous section, and copied below, the material the permanent magnet is made from has a significant effect on the overall strength of a magnet. The material will also determine how its flux is affected by temperature, and how easily the magnet can be demagnetized by opposing magnetic fields.
There are four classes of permanent magnet materials:
Neodymium Iron Boron (NdFeB or NIB)
Samarium Cobalt (SmCo)
Alnico
Ceramic or Ferrite
This table gives us some of the special characteristics of the four classes of magnets.
Br is the measure of its residual magnetic flux density in Gauss, which is the maximum flux the magnet is able to produce. ( 1Gauss is like 6.45 lines/sq in)
Hc is the measure of the coercive magnetic field strength in Oersted, or the point at which the magnet becomes demagnetized by an external field. ( 1Oersted is like 2.02 ampere-turns/inch)
BHmax is a term of overall energy density. The higher the number, the more powerful the magnet.
Tcoef of Br is the temperature coefficient of Br in terms of % per degree Centigrade. This tells you how the magnetic flux changes with respect to temperature. -0.20 means that if the temperature increases by 100 degrees Centigrade, its magnetic flux will decrease by 20%!
Tmax is the maximum temperature the magnet should be operated at. After the temperature drops below this value, it will still behave as it did before it reached that temperature (it is recoverable).
Tcurie is the Curie temperature at which the magnet will become demagnetized. After the temperature drops below this value, it will not behave as it did before it reached that temperature. If the magnet is heated between Tmax and Tcurie, it will recover somewhat, but not fully (it is not recoverable).
(please note that this data is from www.magnetsales.com)
| Material | Br | Hc | BHmax | Tcoef of Br | Tmax | Tcurie |
| NdFeB | 12,800 | 12,300 | 40 | -0.12 | 150 | 310 |
| SmCo | 10,500 | 9,200 | 26 | -0.04 | 300 | 750 |
| Alnico | 12,500 | 640 | 5.5 | -0.02 | 540 | 860 |
| Ceramic or Ferrite | 3,900 | 3,200 | 3.5 | -0.20 | 300 | 460 |
Temperature
The temperature coefficient column indicates how the magnetic flux varies with the temperature of the magnet.
Experiment ![]()
Let's do an experiment to show the effect of temperature on magnets.
The goal will be to measure the flux density of the magnet when it is at three different temperatures, and compare the measurements. Here are some ideas:
1. From the above table, you can find Tcoef of Br and Tmax for four types of permanent magnet materials for background information.
2. What would be needed to perform this test?
a. Select two or three magnets. They could be the same type or different types of material. I would not use SmCo or Alnico since they don’t vary much with respect to temperature. Instead, I would use a Ceramic magnet, or a NdFeB (rare earth) magnet. We won’t have to worry about exceeding their maximum temperatures, and their change in flux density as a function of temperature is relatively great. It is best to use two or three samples to give you better results. Contact Radio Shack at www.radioshack.com or The Magnet Source at www.magnetsource.com or Arbor Scientific at www.arborsci.com or Edmund Scientifics at www.scientificsonline.com for the type of magnet you want.
b. Obtain a meter to measure the flux density of the magnets (Gaussmeter). This can be built from the instructions I provide, or can be purchased from The Magnet Source at www.magnetsource.com as P/N GM1A and probe GM1APT70 (about $450 total).
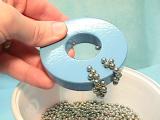
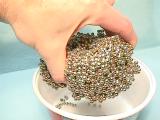
What if you don’t have a way to get or make a Gaussmeter? Well, you could try seeing how many tiny nails or staples or small steel ball bearings the magnet can pick up, and try to obtain a comparison of flux density from that. If the magnet can pick up and hold 22 nails, end to end, when before it could only pick up and hold 20, then you have a 10% increase in flux density. Or, instead of placing the nails end to end, see how many nails can be stuck to the magnet all over its surface. Another way to measure strength would be to place a paper clip a certain number of mm away from the magnet and see if the magnet will pull the paper clip toward itself. By measuring the mm between the magnet and the paper clip where it will pull it across the surface of a smooth table, would be a measure of its flux density. Another way would be to attach a flat headed screw to the magnet, and use a small scale to see how much pull is required to pull the screw from the magnet. More pounds of pull means more flux density. As long as you make comparisons using the same method, you should get reasonable results. If you have a bunch of small steel ball bearings (about 1/16" diameter), see how many will stick to the whole surface of the magnet when doing the test.
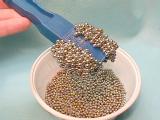
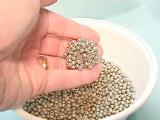

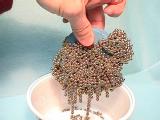

These photos show a bunch of zinc plated steel BB's (about 1/8" in diameter) I bought at a sporting goods store (about $4 for 3000 of them!), stuck to different magnets. I had a lot of fun just playing with the magnets in the BB's. Smaller balls (like steel shot for shot-gun shells) would give you a more accurate result, but these larger ones were easier to handle.
c. Get three temperature baths ready. They don’t have to be ready at the same time. The experiment can be done with hours or days or weeks in between the measurements taken in each of the three temperatures baths.
0 C is made by filling a styrofoam cup with ice and adding just enough water to cause the ice to start to float. Stir the ice water to get an even temperature. In about 10 minutes, the water will be cooled to 0 C and will stay there until all the ice is melted. Keep the magnet totally submersed in the ice water for 15 minutes before removing it to perform the flux test.
100 C is made by boiling water on a stove. When bubbles start to appear, the water is at 100 C and will stay there until all the water is evaporated. Keep the magnet totally submersed in the boiling water for 15 minutes before removing it to perform the flux test.
-196 C is made by using liquid nitrogen. This should be available from hospital supply stores. This must be handled carefully in order to prevent frost burns to the skin (see http://sprott.physics.wisc.edu/demobook/chapter2.htm). When an object is dipped into liquid nitrogen, a lot of bubbles will be seen. When the rapid bubbling stops, the object has reached -196 C. Keep the magnet totally submersed in the liquid nitrogen for 2 minutes after the rapid bubbling stops, before removing it to perform the flux test.
If it is too difficult to obtain liquid nitrogen, get some dry ice from a local supplier (check the yellow pages). This will be a -78 C bath. Again, handle only with gloves, not with your bare hands! Place the magnet between two blocks of dry ice for about 15 minutes before removing it to perform the flux test.
3. Now, you will need to measure the flux density of the magnet when its temperature is at 0 degree C (temperature of freezing water).
a. This may not be super easy since the distance between the magnet and the probe measuring the flux density has a big effect on the measurement, as well as the position of the probe to the edge of the magnet. Mark one face of the magnet with a dot using a permanent marker so you measure the same pole each time. Set up a fixture to hold the magnet and probe in the same position each time a measurement is taken, insuring a fairly repeatable, reliable reading. If the magnet is too strong for the meter, place a piece of plastic or wood between them as a spacer so the meter can read a lower flux density. (Don’t forget that the measurement will increase by about 24 to 40 % when it gets cold.) Call this measurement G2.
b. If you are using the ball bearing method of measuring flux density, place the magnet, using non-magnetic tweezers (plastic or brass or stainless steel), into a dish filled with the small steel ball bearings. Lift the magnet out with all of the ball bearings stuck to it, and place it into a separate bowl. When the magnet reaches a temperature you can handle, pull off the ball bearings still stuck to it and count how many were stuck to it. Call this measurement G2.
4. Then, if the temperature is increased from 0 to 100 degrees C (temperature of boiling water), the flux density (Gauss) of the magnet would be decreased, so that you would be left with approximately the following % of the flux density when originally measured at 0 degrees C:
| Material | Flux density at 100 C compared to 0 C (G3/G2) |
| NdFeB | about 89% |
| SmCo | about 96% |
| Alnico | about 98% |
| Ceramic | about 83% |
So, place the magnet into the boiling water and wait 15 minutes to make sure it is nice and hot. Perhaps you could shape some aluminum foil to hold the magnet in the water and lift it out with it, too. The magnet might otherwise like to stick to the metal pan. If the pan is stainless steel, the magnet may not stick to it. Check this out before you start to boil the water. Place the magnet into the same fixture you used for the 0 C measurement. Call this G3.
5. Now, if the temperature were decreased from 0 to -196 C (temperature of liquid nitrogen), the flux density of the magnet will be increased, so that you would see approximately the following % of the flux density when originally measured at 0 degrees C:
| Material | Flux density at -196 C compared to 0 C (G1/G2) |
| NdFeB | about 124% |
| SmCo | about 108% |
| Alnico | about 104% |
| Ceramic | about 140% |
So, place the magnet into a styrofoam bowl and slowly pour liquid nitrogen into the bowl, covering the magnet. After about 2 minutes, the rapid boiling will stop, indicating the magnet is now at -196 C. Carefully lift the magnet out of the liquid nitrogen using plastic tweezers and place it into the same fixture used for the other measurements. Call this G1.
If dry ice is used instead of liquid nitrogen, let the magnet sit between two blocks of dry ice for 15 minutes before taking the flux measurement. Please note that the change in flux density will not be as great as with liquid nitrogen because the temperature is only -78 C instead of -196 C.
6. Great, now you have the data. Let’s plot G1, G2 and G3 vs temperature for each magnet. (Another data point can be obtained by performing the flux measurement at room temperature. It would be between G2 and G3 in value since a typical room is at 72 F which is 22 C.
Then figure the temperature coefficient by taking:
(G3-G1)*100/(G3*(change in temperature from G3 measurement to G1 measurement)) = % per degree C
For example, if G1 = 87 ball bearings at -78 C, and G3 is 61 ball bearings at 100 C, then the Tcoef =
(61-87)*100/(61*(100-(-78))) = (-26)*100/61*(178) = -0.239% per degree C.
Compare the shapes of the curves when you join the data points with lines for each magnet. Are they different for different materials? Do they have the same slope? Are they the same for the same materials having different shapes? Do the plots have the same slope?
7. One more thing can be done with the magnets. If the temperature is increased above the Curie Temperature, as shown in the first chart above, the magnet will lose its magnetism. When it cools, it will take on some magnetism, depending on what it is near when it cools. In order to get close to 310 C, you would need something like a propane torch used for soldering copper plumbing pipes together in houses. Boiling water is far from that, so this is not a problem. However, if you want to prove the Tcurie, try heating the magnet with a propane torch (realizing you will destroy its magnetism) and do the flux test after it cools off.
8. Write up your expectations, your experimentations, and your results for your report. For the bibliography, don’t forget to note the internet references used for the data in the table in step 1, as well as this Magnet Man source. Then, drop me a line telling me how well it went and any improvements you made along the way.
Demagnetizing fields
The Hc column in the data table above indicates the strength of a magnetic field which can demagnetize a magnet. The magnet would have to be subjected to it in an opposing or repelling manner.
Experiment ![]()
1. Obtain samples of ceramic magnets, alnico magnets and a NdFeB magnet. Mark the North pole on each magnet (use a compass to determine which is the N end of each magnet. Remember, the South end of the compass will point to the North pole of your magnet).
2. Measure the strength of the flux using the same method suggested above for measuring temperature affects. Write down your observations. Then check the polarity of the magnet using your compass. Write down your observations.
3. Take the NdFeB magnet and place it against the ceramic magnet, North pole against North pole. Leave it there for a day. Tape or rubber-band the magnets together to keep them in that position. Do the same thing with the alnico magnet and the NdFeB magnet the next day.
4. Measure the strength of the flux for each magnet again and note the difference. Also check its polarity. Write down your observations.
5. Now, take the NdFeB magnet and place its South pole against the marked North pole of the ceramic magnet. Leave it there for a day. Do the same thing with the alnico magnet and the NdFeB magnet the next day.
6. Again, measure the strength of the flux for each magnet and note the difference. Also check its polarity. Write down your observations.
7. You should see that the flux measurement for the NdFeB magnet does not change. However, the ceramic and alnico will change greatly. The poles of the alnico magnet may even become reversed in step 3.
Physical impact
Magnets can become demagnetized by physically hammering or dropping them when the poles of the magnet are opposite to the poles of the earth, or at right angles to the poles of the earth. Steel nails can also become magnetized when hammered when the nail is lined up with the poles of the earth.
Experiment ![]()
1. Take a steel rod, such as an unused pin from a door hinge or a large nail.
2. Check to see if it has any affect when a compass is brought near it. Write down your observations.
3. Line it up in the North-South direction, sitting on a piece of 2x4 wood.
4. Hit it 50 times with a hammer.
5. Check it again to see if it has any affect on a compass. Write down your observations.
6. Turn the pin around so that it is lined up opposite to what it was in step 3.
7. Hit it 50 times with a hammer.
8. Check it again to see if it has any affect on a compass. Write down your observations.
9. Turn the pin so that it is now lined up in an East-West direction and hit it another 50 times with a hammer.
10. Check it again to see if it has any affect on a compass. Write down your observations.
11. You should see that if unmagnetized to begin with, it will become magnetized in one direction in step 5, magnetized in the opposite direction in step 8, and demagnetized in step 10.
The Care and Feeding of your Magnet
How do you take proper care of your permanent magnet?
There are only four areas you need to be concerned with:
a. Mechanical Shock
b. Heat
c. Moisture
d. Demagnetizing Fields
Depending on the class of magnet you have, the care will vary slightly. (Kind of like taking care of your pet fish!)
Ceramic or Ferrite Magnets
These are the magnets you usually see everywhere - on your fridge, in hooks to hold something, in your shower curtain, in your audio speakers, etc. They are usually black or dark gray in color, but the surface may be painted any bright color. These also include the flexible magnets since the flexible binder has magnetized ferrite material in it.
a. Mechanical Shock
These magnets are brittle - they will chip or crack or break easily when:
dropped onto a hard surface
allowed to smash together with another magnet
allowed to smash together with a piece of metal
struck with a hammer or other hard substance
So, handle gently, like you do with your iPod or cell phone. When you bring two magnets together, be prepared to have the force of attraction increase quickly and dramatically as the North pole of one gets closer to the South pole of the other. Better still, place a plastic disk or rubber washer between them so there is a cushion between them. Watch your fingers so they don't get pinched!
You may not realize it, but every particle within a magnet wants to push away from every other particle next to it. Yes, it is attracted to the particle at its North end and South end, but all along its sides, there is a repulsion. Because of this, if two magnets are allowed to smash together, expect a small chip or particle to fly away at a high velocity and can fly into your eye. That is why it's a good thing to wear goggles - protect your eyes from the unexpected. Those particles have sharp edges and will easily scratch your eyes.
b. Heat
As the temperature increases, the molecules that make up the magnetic material, with their poles all lined up, will start to wiggle and jiggle around, causing the strength of the magnet to decrease. If allowed to go above their maximum working temperature, they will lose some of their strength and will not be able to recover it when it cools back down. If allowed to go above their Curie Temperature, they will lose all of their magnetic strength and will not be able to recover from it.
For ceramic and ferrite magnets, their maximum working temperature is 300 degrees C (572 degrees F).
The maximum working temperature for flexible magnets is about 180C (356F).
The Curie Temperature for ceramic and ferrite magnets is 460C (860F).
I'm not sure about flexible magnets since the binder starts melting around 200C (392F).
Instead, keep your magnets cool.
c. Moisture
Ferrite magnets do not corrode or rust easily, so you don't have to worry too much about them.
d. Demagnetizing Fields
Ceramic or ferrite magnets are fairly rugged regarding their resistance to be demagnetized. This is true as long as you keep them away from rare earth magnets. But when used with other ferrite magnets, there is little chance of demagnetizing them, even if you store them with North and North poles touching.
Alnico Magnets

Alnico magnets are the magnets you usually play with at school, in horseshoe shapes and as bar magnets. They have a color like aluminum and are also usually painted red or black or left with its natural color.
a. Mechanical Shock
These magnets are very tough - they do not chip or crack or break easily when:
dropped onto a hard surface
allowed to smash together with another alnico magnet
allowed to smash together with a piece of metal
struck with a hammer or other hard substance
You still have to be prepared to have the force of attraction increase quickly and dramatically as the North pole of one gets closer to the South pole of the other. Magnets made of alnico are usually cast in a mold and then magnetized.
b. Heat
Heat is another strength for alnico magnets.
Their maximum working temperature is 540 degrees C (1004 degrees F).
The Curie Temperature for alnico magnets is a blistering 860C (1580F).
Hot temperatures are not going to affect these magnets much!
c. Moisture
Again, with the aluminum and nickel mixed in the alloy with the iron, alnico magnets are not prone to rusting or corroding. So they work great in tough environments.
d. Demagnetizing Fields
The weakness of alnico magnets is that they can easily be demagnetized - even with another alnico magnet. They don't last long when you push two North poles together to feel the repulsion. After a while, you will notice that they begin to weaken. The greatest care for these magnets is in how you store them and restore them.
First, you don't want to bring ferrite or rare earth magnets close to alnico magnets. You can very quickly demagnetize them or remagnetize them in the opposite direction! How should they be stored?
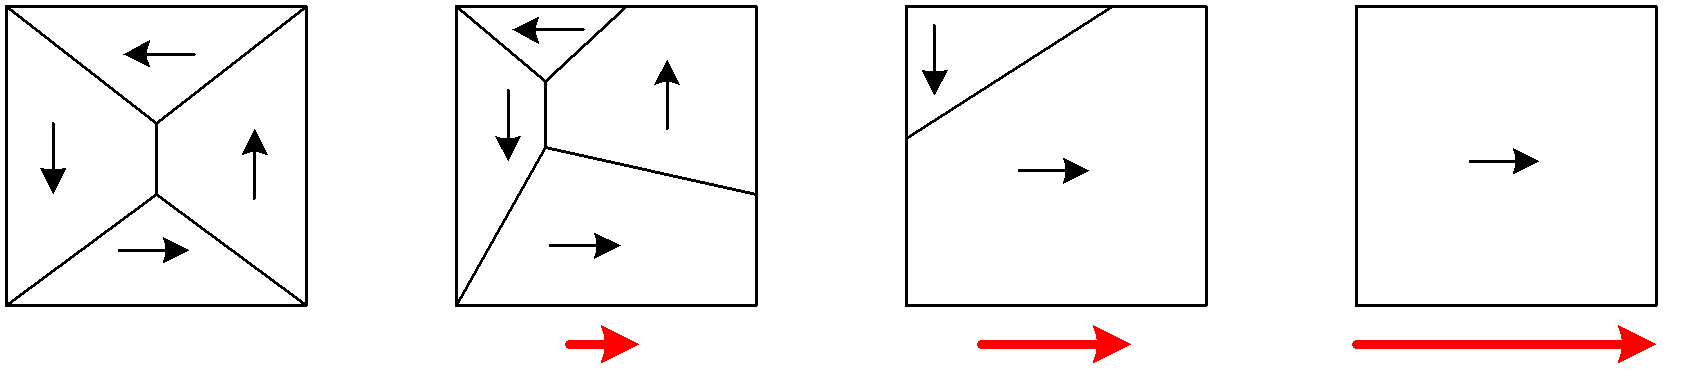
If you have a horseshoe alnico magnet, store them with a keeper. This is just a steel bar that will stick to the two ends of the magnet. The purpose is to allow the field to continue flowing through the horseshoe and not be pushed around by other magnetic fields. The following diagrams show this. You could even place two horseshoes together, with opposite poles touching, to keep them strong.
If you have bar magnets, they can be stored in pairs or back to back with opposite poles touching. Or, if you only have one, place it onto a steel sheet that would act like a big keeper. These diagrams show this.
If and when they become weak, they can be restored using a remagnetizer. These are sold by Arbor Scientific and others. Check the page on magnet supplies. Inside of a remagnetizer are some very strong rare earth magnets that will re-align the domains in the alnico so that they will be as good as new again.
Samarium Cobalt Magnets
SmCo magnets are not seen very often. They are used in small motors for your VCR or your CD / DVD player. They are more expensive than the other magnets, but with a special set of strengths.
a. Mechanical Shock
These magnets are brittle - they will chip or crack or break easily when:
dropped onto a hard surface
allowed to smash together with another magnet
allowed to smash together with a piece of metal
struck with a hammer or other hard substance
So again, handle gently, like you do with your iPod or cell phone. When you bring two magnets together, be prepared to have the force of attraction increase quickly and dramatically as the North pole of one gets closer to the South pole of the other. Better still, place a plastic disk or rubber washer between them so there is a cushion between them. Watch your fingers so they don't get pinched!
You may not realize it, but every particle within a magnet wants to push away from every other particle next to it. Yes, it is attracted to the particle at its North end and South end, but all along its sides, there is a repulsion. Because of this, if two magnets are allowed to smash together, expect a small chip or particle to fly away at a high velocity and can fly into your eye. That is why it's a good thing to wear goggles - protect your eyes from the unexpected. Those particles have sharp edges and will easily scratch your eyes.
b. Heat
For a very strong magnet, these can handle a fair amount of heat.
Their maximum working temperature is 300 degrees C (572 degrees F).
The Curie Temperature for SmCo magnets is 750C (1382F).
Very respectable for a sintered magnet.
c. Moisture
Rust and corrosion from water is not a big factor with SmCo magnets. They can survive in a fairly tough environment.
d. Demagnetizing Fields
About the only thing that can demagnetize a SmCo magnet is a NdFeB magnet. So for storage, keep them separate from other classes of magnet for two reasons: 1. they don't demagnetize other, weaker magnets and 2. so they aren't demagnetized by stronger magnets.
Neodymium-Iron-Boron Magnets

NdFeB magnets are the strongest permanent magnets around today, and are not very expensive. They are used in headphones, disk drives, new toys, all over the place.
a. Mechanical Shock
These magnets are brittle - they will chip or crack or break easily when:
dropped onto a hard surface
allowed to smash together with another magnet
allowed to smash together with a piece of metal
struck with a hammer or other hard substance
So again, handle gently, like you do with your iPod or cell phone. When you bring two magnets together, be prepared to have the force of attraction increase quickly and dramatically as the North pole of one gets closer to the South pole of the other. Better still, place a plastic disk or rubber washer between them so there is a cushion between them. Watch your fingers so they don't get pinched! Because these magnets are so much stronger than others, this needs to be a real precaution!
You may not realize it, but every particle within a magnet wants to push away from every other particle next to it. Yes, it is attracted to the particle at its North end and South end, but all along its sides, there is a repulsion. Because of this, if two magnets are allowed to smash together, expect a small chip or particle to fly away at a high velocity and can fly into your eye. That is why it's a good thing to wear goggles - protect your eyes from the unexpected. Those particles have sharp edges and will easily scratch your eyes.
b. Heat
This is the weakness of this magnet.
Their maximum working temperature is only 150 degrees C (302 degrees F).
The Curie Temperature for NdFeB magnets is 310C (590F).
This is why they usually aren't used in motors. Keep your magnets cool.
c. Moisture
This is another area of weakness. To combat the problem of these magnets corroding so easily, they are usually coated or plated. A popular plating material is zinc since it is cheap, but it isn't very good. A better coating is nickel. This keeps them looking nice and shiny for a long time. Some are coated with a very thin layer of gold over the nickel. This is more for looks, but is also useful since gold does not tarnish.
d. Demagnetizing Fields
This is an area where these magnets outperform others. They are tough to demagnetize. This also means that they can easily demagnetize other classes of magnets - like SmCo or Alnico or Ferrite! Again, store your magnets separately by class.
Storage of Magnets
Basically, store different classes of magnets separately. Keep your ferrites together in one place, your Alnico in another (away from the ferrites), your SmCo in still another location, and your NdFeB magnets by themselves. This is the biggest rule for storage - putting distance between the various classes of magnets.
What do I do with them after they are separated into their classes?
Ferrite magnets should be stacked, North to South, with others their same size. When you have a really long stack, start another stack. These stacks can sit side by side in a drawer or box. You may want to place them in plastic bags, or wrap them in paper towels to keep the drawer clean - otherwise the drawer surface starts to take on a gray color.
Alnico magnets should be kept in their own drawer or box. Remember their keepers for the horseshoes, and remember to stick pairs together or place a steel bar alongside the bar magnets. Other magnets can easily demagnetize them. See the photos above for Alnico magnets.
If you have SmCo magnets, keep them in their own drawer or box. Stack them with a separator between them to make it easier to slide them apart when you want just one.
NdFeB magnets can be jumbled together, really, but if you do this, they will be very difficult to separate from each other. It would be neater to place them in groups of similar shapes. For magnets that are larger than 1/2" on a face, place a plastic disk or sheet as a separator between each magnet to make it easier to slide them apart. Wrap groups of them in a paper towel or place them in plastic bags so the groups can be easily separated. I keep my spherical Neodymium Iron Boron magnets in tennis balls so I don't hurt myself and they don't whack into each other destroying themselves.
Isolating Magnets ![]()
What if you want to keep stray magnetic fields to a minimum? Having magnets in a drawer or box isn't too bad since the strength decreases with the square of the distance. It decreases quickly. If you really want to isolate the magnetic field created by the permanent magnets, you will need to make a steel cage or box to keep them in. Here are some ideas.
Having a stack of magnets will produce a large, stray field.
Placing a stack of magnets onto a steel bar or plate helps contain some of the field.
Placing 2, 3 or 4 steel bars around the stack of magnets does a good job of containing the magnetic field.
Sticking steel end pieces onto the stack of magnets further directs the field into the bar and not allow it to stray.
Sticking multiple bars around the magnets, with steel end pieces, takes this a step further. There is very little stray field with this arrangement.
Place half the stack of magnets onto a steel plate, and place the other half, turned around, onto the same plate, and add a second plate on top. So, each plate is seeing a North pole from one stack and a South pole from the other stack. The steel plate is acting like a low resistance path for the magnetic field to from one stack to the other. Think of this as shorting out the magnet - but this does not damage the magnet in any way!
Placing any of the above into a steel container will prevent the field from going outside the steel container. This can be something like a paint can or soup can.
The best you can do is to place the magnets into a thick, steel container with space between the magnets and the inside walls.
When shipping magnets, the field outside the shipping carton needs to be below a certain level. This is often achieved by:
1. wrapping the magnet(s) in foam
2. placing it in a plastic bag
3. placing the bag into a steel can with foam between the bag and the inside walls of the can
4. placing the can into a cardboard box with styrofoam packing surrounding the can to keep it in the middle of the box
If you build the gaussmeter I describe, you can check to see how weak the field outside the box is. Make this an experiment to determine the most cost effective solution to achieving a method of storing magnets with very low stray fields.
To goal is to contain the field. The best way to do this is to provide an easy path for the magnetic field to go from the North pole to the South pole. If you do that, the field won't want to go anywhere else! You direct it where you want it.
Magnetism in Space
The study of the magnetism found in the planets and the sun of our solar system has been a very exciting field during the last 100 years.
Earth
Of course, trying to understand the magnetism within our own planet earth has been going on for a very long time, and only recently (within the 1990s) has a reasonable model been made which closely mimics how the magnetic field is created and how it changes over time. Recently, it has been determined that the core of the earth's core rotates about 0.3 to 0.5% faster than the crust, which may have an effect on the magnetic field generated. There are also models of the expected strength and direction of the magnetic field seen on the surface of the earth at various locations. But there is more to the Earth's magnetic field than what we can measure at various locations on its surface. There is also the effect the earth's magnetic field has on the solar wind coming from the sun. The solar wind is what the stream of particles created by the sun is called. It travels as fast as 1.7 million miles per hour (800 km/sec) and goes out in all directions from the sun! When special eruptions occur on the sun, we can measure the effects on Earth about 52 hours later. Several scientists have been studying the strength of the magnetic field of the earth out in the space around our planet, and have been able to obtain a good understanding of its shape and how it varies over time. Did you know that the aurora borealis ("Northern Lights") is caused by the Earth’s magnetic field and its interaction with ionized particles? Amazing stuff, isn’t it?
Sun
 (from Astronomy Picture of the Day)
Studying the sun, especially the sun spots and the massive flares and eruptions happening on the surface of it, has shown that magnetism plays a major role in the life of our star. The sun goes through an 11 year cycle of sunspot activity. Actually, it's a 22 year cycle, because at the peak of the activity is when the magnetic field created within the interior of the sun flips, just like the magnetic field of the earth has flipped in the past. That's what creates the sunspots, just like the odd magnetic poles that are created when the earth is partway through its field reversal. Here are some great sites which describe the studies going on. Did you realize that the scientists are able to measure the strength of the magnetic fields on the sun by carefully measuring the absorption lines seen in the color spectrum from the light from the sun, in the areas of the solar flare. When the light is exposed to a strong magnetic field, the spectrum lines will begin to split into two or more lines! The amount of the split is proportional to the strength of the magnetic field. This is called the Zeeman effect.
A video about magnetic stars: http://hubblesite.org/newscenter/newsdesk/archive/releases/2001/19/video/a
Planets
What do we know about the other planets and the moons in our solar system? Quite a bit. Most of the satellites and space probes sent out have instruments on them to measure the magnetic field in the vicinity of the space probe. (Arthur C. Clarke’s book and movie "2001" was based on the fictional event of finding an object buried on the moon’s surface. In the story, this object was found when the scientists were performing a magnetic survey of the moon’s surface, and noticed a very strong anomaly at a particular location.) A close friend of mine, Herman Eckelmann, the pastor of the church I attended while at Cornell University, worked as a research associate with Frank Drake, Tom Gold and Carl Sagan at the Center for Radiophysics and Space Research. He holds a patent for one of the instruments used on satellites to measure the magnetic fields in space.
Meteorite Dust
As you know, several tons of meteorite dust falls to earth due to the debris from meteorites and micrometeorites. There are several sites that talk about ways to collect some of this dust. Most meteors have a high iron and nickel content, which makes them ferromagnetic. Check these sites out for more details:
http://www.pbs.org/wgbh/nova/teachers/activities/3111_origins.html
(a great site with all the info you need!)
http://www.teachersource.com/micrometeorites.htm
http://www.novaspace.com/METEOR/Find.html
http://www.geocities.com/aerolitehunter/methunt.html
http://www.meteors.com/about.html
http://epswww.unm.edu/iom/Howto.htm
http://www.namnmeteors.org/meteorite-tests.html
How do magnets work?
Questions that often come up are, "How do magnets work?", or, "Why is iron magnetic?", or, "What makes a magnet?", or, "What is the magnetic field made of?".
Those are good questions, and deserve a good answer. However, did you know that there is a lot about magnets at the atomic level that isn't known yet? Just like with most of the other basic forces we are familiar with, such as gravity, electricity, mechanics and heat, scientists start by trying to understand how they work, what they do, are there any formulas that can be made to describe (and thus predict) their behavior so we can begin to control them, and so on.
The work always starts by simple observation (that's the fancy word for playing around with the stuff!). That's why it's so important to have some "hands-on" experience with magnets. Have you taken two magnets and tried to push like poles together? How far away do you start to feel the repulsion? How does the force vary with the distance between them? When the magnets are moved off-axis to each other (moving them to the side and not head on) what does it feel like? Could you describe it like trying to push two tennis balls together? When you flip one around, what changes? What about moving one around the other in a circle? Try these things! That's how you learn! Only when you play with (observe) them will you begin to understand how they work. This is the stuff great scientific pioneers did, like Faraday, Lenz, Gilbert, Henry and Fleming.
What we can find out this way, is some of the basics of magnetism, like:
- the north pole of the magnet points to the geomagnetic north pole (a south magnetic pole) located in Canada above the Arctic Circle.
- north poles repel north poles
- south poles repel south poles
- north poles attract south poles
- south poles attract north poles
- the force of attraction or repulsion varies inversely with the distance squared
- the strength of a magnet varies at different locations on the magnet
- magnets are strongest at their poles
- magnets strongly attract steel, iron, nickel, cobalt, gadolinium
- magnets slightly attract liquid oxygen and other materials
- magnets slightly repel water, carbon and boron
and so on
Now, the fun begins. We start to ask the question, "Why?" This is what scientists continually do - try to figure out why things behave the way they do. Once we figure that out, we have a better handle on how to apply them to make useful tools for us, right?
Let me share with you some of what is known about how magnets work. All of the questions have NOT been answered, perhaps you will help answer some of them. So, some of what is known are simply observations, some are guesses, but a lot has been figured out.
Atomic Magnetism
There are only a few elements in the periodic table that are attracted to magnets. None of the elements, by themselves, make good permanent magnets, but can become temporary magnets (when close to another magnet). When alloys of various metals are made, some of these alloys make very good magnets. Why? We don't really know, but we can observe some consistent rules.
As you know, we have seen that when current flows in a wire, a magnetic field is created around the wire. Current is simply a bunch of moving electrons, and moving electrons make a magnetic field. This is how electromagnets are made to work. This will be important to keep in mind as we zoom into the structure of atoms.
Around the nucleus of the atom, where the protons and neutrons live, there are electrons whizzing around. We used to think that they had certain circular orbits like the planets have around the sun, but have discovered that it is much more complicated, and much more exciting! Instead, the patterns of where we would likely find the electron within one of these orbitals takes into account Schroedinger's wave equations. Pictures of each of these orbitals can be found at http://www.shef.ac.uk/chemistry/orbitron/index.html. (These also take into account Heisenberg's uncertainty principle and probability theory.)
First, electrons can be thought of as occupying certain shells that surround the nucleus of the atom. These shells have been given letter names like K,L,M,N,O,P,Q. They have also been given number names, such as 1,2,3,4,5,6,7. (This is what quantum mechanics is all about).
Within the shell, there may exist subshells or orbitals, with letter names such as s,p,d,f. Some of these orbitals look like spheres, some look like an hourglass, others look like beads on a bracelet.
The K shell contains an s orbital. Called a 1s orbital.
The L shell contains an s and p orbital. Called a 2s and 2p orbital.
The M shell contains an s, p and d orbital. Called a 3s, 3p and 3d orbital.
The N, O, P and Q shells each contain an s, p, d and f orbital. Called a 4s, 4p, 4d, 4f, 5s, 5p, 5d, 5f, 6s, 6p, 6d, 6f, 7s, 7p, 7d and 7f orbital.
These orbitals also have various sub-orbitals.
The s orbital can contain only 2 electrons and has no sub-orbitals.
The p orbital can contain 6 electrons, 2 in each of its 3 sub-orbitals, like px, py and pz.
The d orbital can contain 10 electrons, 2 in each of its 5 sub-orbitals, like dxy, dxz, dyz, dz2, dx2-y2.
The f orbital can contain 14 electrons, 2 in each of its 7 sub-orbitals.
(And there is a g orbital that can contain 18 electrons, 2 in each of its 9 sub-orbitals, for highly excited electrons.)
A maximum of 2 electrons can occupy a sub-orbital where one has a spin of UP, the other has a spin of DOWN. There can not be two electrons with spin UP in the same sub-orbital. (Pauli exclusion principal.) Also, when you have a pair of electrons in a sub-orbital, their combined magnetic fields will cancel each other out.
In order to show how many electrons are in each orbital, the following convention is sometimes used:
Chlorine has 1s22s22p63s23p5 for a total of 17 electrons. This tells us that there are 2 in 1s, 2 in 2s, 6 in 2p, 2 in 3s, and 5 in 3p.
Let's look at the pattern of how the electron orbitals are filled as we move up in the periodic table of the elements. (This is a fantastic site on the elements!!!)
[DIRECTIONS: click on the figure above to go to http://www.webelements.com/webelements/elements/text/Fe/econ.html. Find the box on that page like the one above. Click on the left and right arrow buttons within that box to see how the electron orbitals and sub-orbitals are filled as you step through the periodic table.]
As you can see, the general order for filling the electron orbitals follows a sequence since the energy level for each orbital increases in this sequence:
1s, 2s, 2p, 3s, 3p, 4s, 3d, 4p, 5s, 4d, 5p, 6s, 4f, 5d, 6p, 7s, 5f, 6d, 7p
After each orbital is full, it starts to fill the next one in this sequence. There are a few odd jumps in the sequence when you get to filling the 4f, 5d and 6p orbitals, but that's how it goes.
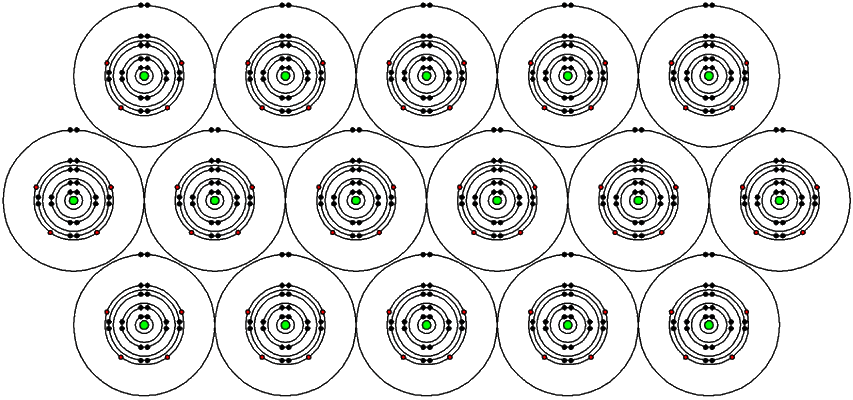
If we were to examine Iron (atomic number 26), Cobalt (27), Nickel (28) and Gadolinium (64), all of which are considered ferromagnetic since they are strongly attracted to a magnet, it is difficult to see what makes them so different from the other elements next to them or below them in the periodic table. In other words, if Iron is so strongly magnetic, why isn't Manganese? Perhaps there are other factors we need to take into account such as the crystalline structure. But it is generally accepted that these ferromagnetic elements have large magnetic moments due to un-paired electrons in their outer orbitals. This is like having current flowing in a coil of wire, creating a magnetic field. Even the spin of the electron is thought to create a minute magnetic field. When you get a bunch of these fields together, they add up to bigger fields.
Iron (Fe)
Atomic Number 26
Electron configuration 1s22s22p63s23p63d64s2
This shows the electron orbits as circular rings around the nucleus. It really isn't like this, but it makes a good diagram.
The green dot in the center is the nucleus with the 26 protons and 26 neutrons.
The orange dots in the 3d orbital are the 4 unpaired electrons.
The unpaired electrons in 3d create a magnetic moment, or force. It is thought that D/r must be 3 or more to create ferromagnetism. This condition occurs in Iron, Cobalt, Nickel and rare-earth groups.
We can go one level deeper into quantum mechanics. This is where we ask, "What is the magnetic field made of?"
Today, there are four basic forces that are known: gravity, electromagnetism, weak, strong. What creates these forces? There is speculation among particle physicists that these forces are the result of photons that are exchanged between particles. This exchange is what creates a repulsion or attraction between various particles, giving us the forces we call gravity, magnetism, and others that hold the protons together in the center of the atom. For a more in-depth understanding, you will want to read about the Standard Model of the atom at
http://particleadventure.org/particleadventure/frameless/standard_model.html and
http://particleadventure.org/particleadventure/ and
http://www.schoolscience.co.uk/content/4/physics/particles/index.html
Magnetic Domains
1. Magnetic moments in neighboring atoms are held parallel by quantum mechanical forces.
2. These atoms with these magnetic characteristics are grouped into regions called domains. Each domain has its own North pole and South pole.
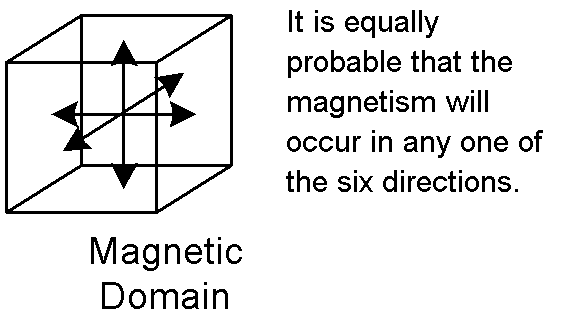
A Domain is the smallest known permanent magnet. About 6000 domains would occupy an area the size of the head of a common pin.
A domain is composed of approximately one quadrillion (1,000,000,000,000,000 or 1015) atoms.
3. In unmagnetized ferromagnetic materials, the domains are randomly oriented and neutralize each other or cancel each other out. However, the magnetic fields are still present within the domains!
(These diagrams show domains as small cubes or squares - kind of a micro view.)

Here is a sample of unmagnetized iron, showing its domains in random magnetic orientations (x is arrow away from you = South Pole, dot is arrow toward you = North Pole)
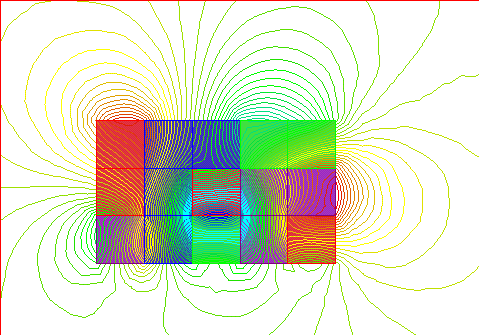
This shows the magnetic field around that sample of unmagnetized iron with its groups of domains, like those noted above, with random orientations. As you can see, this sample has multiple North and South poles where the magnetic field lines exit and enter the material.
4. The application of an external magnetic field causes the magnetism in the domains to become aligned so that their magnetic moments are added to each other and lined up with the applied field.

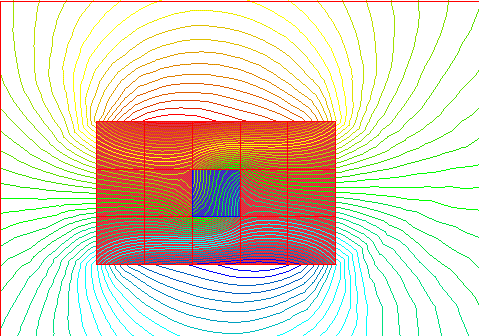
This shows the magnetic field around a group of domains, where all but one is oriented in the same direction.
And this shows the magnetic field around a group of domains that are all lined up together.
With soft magnetic materials such as iron, small external fields will cause a great amount of alignment. However, because of the small restraining force only a little of the alignment will be retained when the external field is removed.
With hard magnetic materials such as Alnico a greater external field must be applied to cause alignment of the domains, but most of the alignment will be retained when the field is removed, thus creating a stronger permanent magnet, which will have one North and one South pole.
If we were to look at this from more of a macro level, a level at which we have actually seen under microscopes, we would see larger domains - not as cubes or squares, but more like irregular polygons.
If you were to examine a piece of iron that is not magnetized, you will find that the domains within the iron will not be pointing in the same direction, but will be pointing in a bunch of random directions. This randomness is what causes the magnetic field of each domain to be cancelled out by the magnetic field of another domain. The result is that there is no single north pole or south pole. Instead, there are a bunch of north and south poles all over the place that cancel each other out.
Now, if this piece of iron were placed within an external magnetic field (created by current flowing in a solenoid), the domains will start to line up with the external magnetic field. It takes some energy to cause a domain to re-orient itself. As the external magnetic field becomes stronger, more and more of the domains will line up with it. (Another way to look at it is that the domains that are aligned with the external magnetic field will grow in size, and the others will shrink.) There will be a condition where all of the domains within the iron are aligned with the external magnetic field. This condition is called saturation, because there are no more domains that can be lined up, no matter how much stronger the magnetic field is made.
(These diagrams show domains as irregular polygons - more of a macro view.)
no external mag field small mag field larger mag field large mag field, saturation of domains
Resulting magnetic field with the domains as indicated above with no external mag field.
Note that the domains still have their own magnetic field, but that the field lines stay almost exclusively within the material.
Very little leaks out of the material. This would be an example of unmagnetized iron.
Resulting magnetic field with the domains as indicated above with small mag field.
This has two north poles (lower right and upper right) and one very spread-out south pole (on the left).
Resulting magnetic field with the domains as indicated above with larger mag field.
Starting to look more like a magnet with a defined north and south pole.

Resulting magnetic field with the domains as indicated above with large mag field, saturation of domains.
This is what a permanent or temporary magnet would typically look like.
What happens when the external magnetic field is reduced back to zero? In a soft magnetic material (such as iron or silicon steel), most of the domains will return to their random orientations, so that you will be left with a very weak magnet since only a few of the domains will be lined up in the same direction. In other words, you are back where you started from. In a hard magnetic material (alloys of iron such as Alnico, some steels, neodymium-iron-boron, etc), most of the domains will remain aligned, so that you will be left with a strong magnet. Since the ending point is not the same as the starting point for magnetic materials, they have what is called hysteresis.
Magnetic Poles
1. A freely suspended bar magnet will always tend to align itself with the North and South magnetic poles of the earth. An example of this is the magnetic compass.
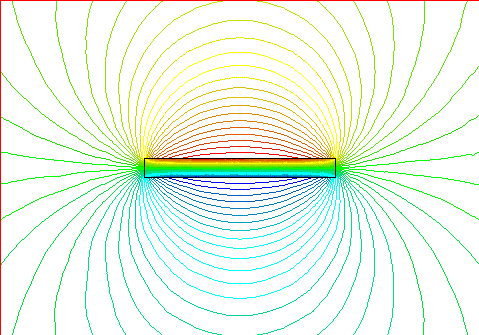
This shows the magnetic lines of force for a long, narrow bar magnet. North is on the right end.
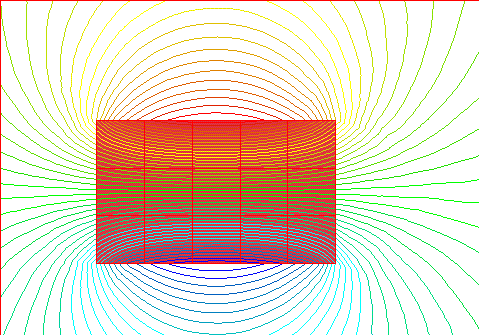
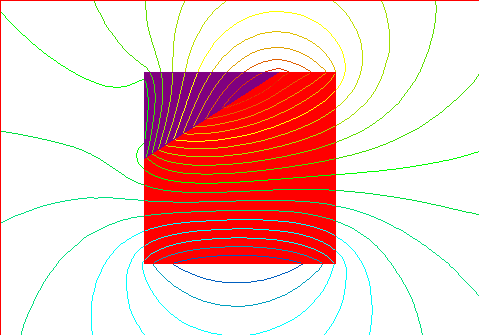
This shows the magnetic lines of force for a flat, wide magnet. North is on top.
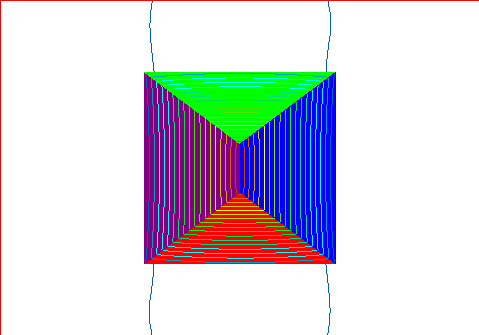
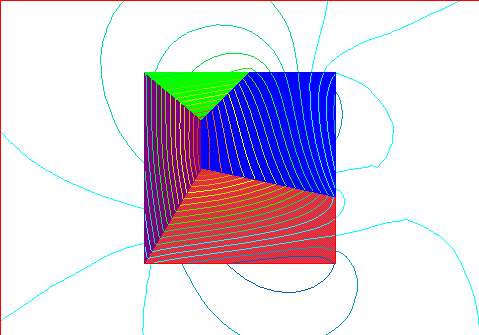
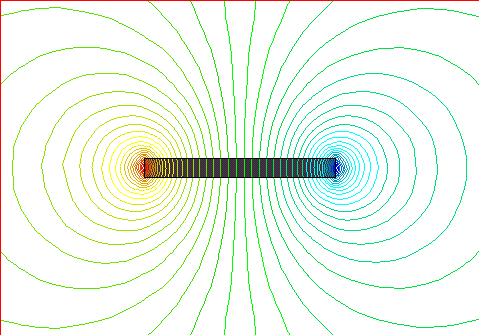
Note the concentration of lines where they exit or enter the magnet, at the ends. This is what defines a pole. Since magnetic fields are like rubber-bands, and since they like to crowd into ferromagnetic material whenever it can, they bunch up inside the magnet material. Again, since the field lines are like closed loops, there is always some place where they enter the magnet (South pole), and some place where they exit the magnet (North pole). These places are the poles. The magnetic field lines tend to be closest together there. This is why, if you break a magnet in half, you will still have a North pole and a South pole, since the lines enter one magnet, then exit it, then enter the next magnet, then exit it, before it goes back to the first magnet again. This is also why we can't have a "monopole" or single pole. If the magnetic field line exits the magnet, somewhere it will have to enter it again - the loops are closed like rubber-bands. The minimum number of poles a magnet can have is two - one each of North and South. However, it is possible for a magnet to have more than two poles, right? Look at the pictures above again, where we have a lot of random square domains. See all the poles all around the periphery of the group of domains? I count about 10! Below is a magnet with 8 poles.

This magnet has 8 poles - 4 North and 4 South, or 4 pole-pairs.
A compass in the vicinity of a magnet will always point along a tangent to one of the magnetic field lines.
This occurs because unlike poles of a magnet are always attracted to each other by the invisible lines of force whereas like poles repel each other. The earth acts like a large permanent magnet. In fact, the earth is the largest magnet in the world. But don't forget the sun that also has a magnetic core, and so do collapsed stars, and they are bigger than the earth! I wouldn't call the earth a permanent magnet like other magnets we are used to. Its magnetism is the result of electron convection currents in the liquid core, and they have flipped around a few times in the past, just like what the sun does every 11 years. So, it's really more like an electromagnet.
2. Permanent magnets can be designed and engineered in hundreds of shapes and sizes to perform various tasks.

For example, the horse-shoe shape is very commonly used in magnetic separators because its lines of force are mostly at the open end of the horse-shoe, and this helps in the separation of ferrous materials. A piece of iron placed within the effective range of the magnetic field will, in turn become magnetized. It will have its own North and South poles and will be attracted to the permanent magnet.
Summary
What all this is saying, is that the atoms of ferromagnetic materials tend to have their own magnetic field created by the electrons that orbit it.
Small groups of about 1015 atoms tend to orient themselves in the same direction. These groups are called domains. Each domain has its own north pole and south pole.
If you were to examine a piece of iron that is not magnetized, you will find that the domains within the iron will not be pointing in the same direction, but will be pointing in a bunch of random directions. This randomness is what causes the magnetic field of each domain to be cancelled out by the magnetic field of another domain. The result is that there is no single north pole or south pole. Instead, there are a bunch of north and south poles all over the place that cancel each other out.
Now, if this piece of iron were placed within an external magnetic field (created by current flowing in a solenoid), the domains will start to line up with the external magnetic field. It takes some energy to cause a domain to re-orient itself. As the external magnetic field becomes stronger, more and more of the domains will line up with it. (Another way to look at it is that the domains that are aligned with the external magnetic field will grow in size, and the others will shrink.) There will be a condition where all of the domains within the iron are aligned with the external magnetic field. This condition is called saturation, because there are no more domains that can be lined up, no matter how much stronger the magnetic field is made.
When the external magnetic field is then removed, soft magnetic materials will become randomly oriented domains again. However, hard magnetic materials will keep most of their domains aligned, making it a strong permanent magnet.
Magnetic field lines are closed loops. They enter a magnet at its South pole, and exit a magnet at its North pole. The poles may cover a large area, where the concentration of lines is not uniform.
Scientific Disciplines
Did you notice all of the scientific disciplines that are involved with magnets? I'll list the ones I can think of, perhaps you can add some to this list.
quantum mechanics
probability theory
particle physics
chemistry
mathematics
material science
electrical engineering
application engineering
those-who-like-to-play-around-with-magnets engineering
Is there free energy in magnets?
Every once in a while I come across a paper or article while surfing the web which claims that it is possible to tap into the free energy which is available from the earth's magnetism, or from some other magnet.
This all sounds great, but there is the problem that energy is never free but always comes with a price.
Sure, in order to magnetize a magnet, energy needs to be put into it. This is done when a large current is pulsed through a coil in which the material to be magnetized sits. The result of this pulse of current, which contains a certain amount of energy that can be measured, is to enlarge the magnetic domains which are parallel with the magnetic field within the material being magnetized. What will cause the magnetic domains to shrink again? Three things,
1. An increase in the temperature of the magnet.
2. An external demagnetizing magnetic field.
3. Physically shaking or striking the magnet.
Each of these, as you can see, requires that energy be spent (heat, magnetic field, motion). None of these allows for a way to capture energy released by the decrease in the overall magnetic field. (Adiabatic cooling does capture some of the heat energy due to the overall magnetic domains becoming random, but it requires energy to be put into the material first.) Also, there are always energy losses in every circuit (in various forms of heat energy, sound energy, mechanical energy, chemical energy, electrical energy, etc).
A keyword often used by those who think they have found the secret to free energy is: over-unity. What they mean by this is that the ratio of the energy output to the energy input is greater than 1 (more energy comes out than goes in). It sounds great, but the physics is poor. When making energy measurements, there are a number of errors that can be made, often unwittingly, that falsely indicate over-unity is possible. In reality, it isn't.
I have also heard of a scheme that changes some of the matter into energy (using E=mc^2) by actually taking the copper atoms and converting them into energy. If that inventor is able to accomplish this, great. But, this would not fall into the "over-unit" group of inventions. A sun or a star is good at doing this. They have the advantage of high pressures and high temperatures and large mass.
Here's are great sites which explain what is often neglected by those proposing free energy devices:
http://phact.org/e/z/freewire.htm a short review
http://www.magnequench.com/tech_resources/tech_center/reference/papers/comments_energy_in_mag.pdf an article by Peter Campbell titled, "Comments on Energy Stored in Permanent Magnets" from IEEE Transactions on Magnetics, Vol 36, No 1, Jan 2000
http://farside.ph.utexas.edu/teaching/em1/lectures/node61.html are lecture notes on magnetic energy
http://www.physlink.com/Education/AskExperts/ae354.cfm for a discussion on how the energy of a magnet changes
http://www.lhup.edu/~dsimanek/museum/unwork.htm for discussions on perpetual motion machines
How much energy is actually stored in the permanent magnet's magnetic field? Check these papers out:
http://elettrica.ing.uniroma1.it/Staff/Chiara/ISEF2005.pdf
http://femm.foster-miller.net/Archives/misc/BarMagnet.pdf
http://femm.foster-miller.net/wiki/PMEnergy
http://www.arnoldmagnetics.com/mtc/pdf/strout_univ_mag_literacy.pdf
In summary, there is no way to obtain free energy with any kind of combination of wires or magnets or switches (commutators, diodes, etc).
What is attracted to magnets?
Take a wand magnet and go around the house to see what will stick to it or feel like it is attracted to it. Keep a list of the items you tried, and if the attraction was strong, weak, or none. Then try to figure out why.
Metals ![]()
Try especially different types of metals, for example:
iron and steel (nails, screws and nuts)
stainless steel (special hardware, some kitchen sinks, most everyday forks and spoons)
brass (special screws, kick-plates on front doors)
zinc (battery case)
copper (old pennies, copper pipes)
bronze (marine bell)
aluminum (foil)
silver (expensive silverware, some jewelry)
gold (wedding rings, grandma's teeth)
mercury (thermometer - no need to break the thermometer to do the test)
nickel (some coins, US nickels are made of 75% copper!, try Canadian nickels)
tungsten (filament in light bulb)
magnesium (from a science supply store, used in a ribbon form for burning in air, or from a hardware store that carries magnesium floats for working with concrete)
coins from several countries (try Canada, England, China, Japan, Germany)
About the US coins, I know the following:
Before 1982, the penny was 95% copper. After that, it was changed to 2.6% copper. It is mostly a zinc alloy with a copper coating.
The nickel is 75% copper.
The dime, quarter and half dollar is 91.67% copper.
The Susan B. Anthony dollar is 87.5% copper.
The new gold-colored dollar is 90% copper.
To learn more about some of these metals, check out the pendulum experiment.
Below is a photo showing some of these metals, and a photo showing copper balls. (I got the copper balls from at gift shop in the UP of Michigan, at Big Springs State Park, just north of Manistique.) The cylinder of titanium was from a jet engine exhaust system.


Minerals ![]()
Besides seeing what effect a strong magnet has on different metals, try and find out the effect it has on different minerals. A great source of minerals is found in the shops of most public, natural and science museums and in science shops or nature stores at malls. They usually have a stand with several different types of colorful minerals displayed; often the pieces are highly polished. They come with a small card describing the mineral, and cost about $1 per item.
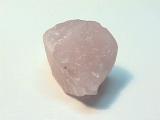
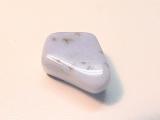
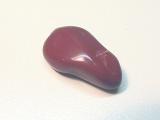
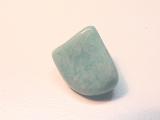
Rose quartz Blue lace agate Jasper Chalcedony
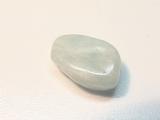
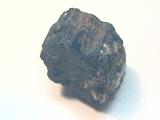
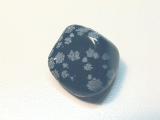
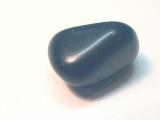
Sodalite Tourmaline Snowflake obsidian Obsidian
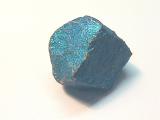
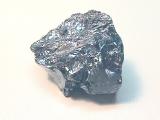
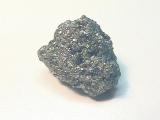
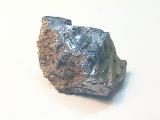
Bornite (Peacock ore) Silicon Pyrite Galena
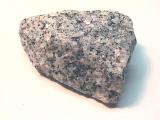
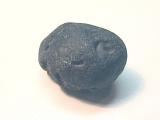
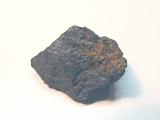

Quartz Tektite Lodestone Hematite
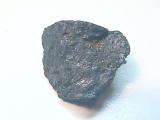
Bismuth Lodestone Tigereye Blue calcite
Magnetite Iceland Spar (interesting optical properties)
In particular, try minerals with iron or nickel in them. An interesting science fair project would be to have several types of minerals on display along with a wand magnet. You can see which minerals are strongly attracted to the magnet (can be picked up by the magnet), which are slightly attracted to the magnet, and which are not attracted at all. Try to predict what category each would fall into.
Here are some minerals I know are strongly or slightly attracted to magnets:
Hematite
(This is usually the very shiny, black, heavy mineral found in the displays, shown at the left in the first photo. Some jewelry is made of hematite.)
Magnetite
(This may very likely be a weak magnet by itself! Remember, this was what started the whole study of magnetism to begin with in ancient Greece. This is seen in the fifth photo above.)
Lodestone (similar to magnetite, but without the cubic crystalline form)
Franklinite
Chromite
Ilmenite
Pyrrhotite
Don't forget to try pyrite (also known as "fool’s gold", made of iron and sulfur), cobaltite, zincite, arsenopyrite, skutterudites, obsidian (also known as Apache Tears) and others.
To make the project more colorful and interesting, I also have some silicon, tektite, tourmaline, quartz, marble, tiger-eye, peacock ore, bismuth and others minerals. Possible selection of minerals from Edmund 81-632. Also check this site for more as a source for minerals and other interesting links:
http://www.greatsouth.net/
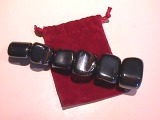
I found some magnetized stones that looked like hematite but they would stick to each other! I was at Wonderworks in Orlando, Florida when I spotted them. Now, hematite cannot be permanently magnetized. So, how do they do that? They are actually ferrite magnets that have been polished to look like hematite and then magnetized. I had heard about spheres of these that would stick together making a bracelet, too.
Ferrofluids ![]()
The area of ferrofluids is quite new, and very interesting. Ferrofluid is made of small particles (~10nm) of magnetite (Fe3O4) surrounded by a surfactant such as tetramethylammonium hydroxide. The surfactant is needed to keep the particles of magnetite from agglomerating (clumping together) due to magnetic and van der Waals interactions. It's like having a slippery skin around the small particle of magnetite. Thermal motion helps, but is not sufficient by itself. A group of these prepared particles is like a solution that acts like a medium density liquid which is affected by magnetic fields. When a magnet is brought near it, the liquid splits up and starts to group itself into spikes or hairs along the magnetic field lines as shown in the photos. It is used to seal rotating shafts, and in speakers to help dampen the vibrations of the speaker coil, and help cool the coil. Great stuff to play with!
Here are some photos of what you can do with a vial of ferrofluid (I purchased the kit FF-100 from Educational Innovations as well as the separate preform display cell FF-200 sitting in front.) When storing the preform display cell, it is best to sit it onto its cap. This keeps the interior walls cleanest. Cost for the kit is about $50. Cost for the preform cell is about $17.
Arbor, Edmund 82-215, AS&S, EdIn FF-100, FF-200.

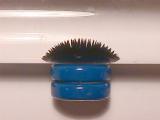
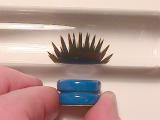
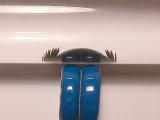
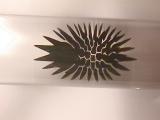
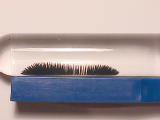
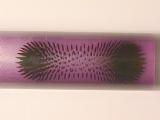
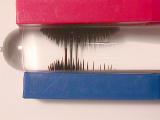
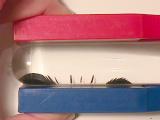

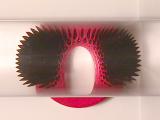

Other Objects ![]()
Try other materials, too, like wood, plastic, carbon, cotton, wool, glass, concrete, leaves, CDs, and so on, which you can find around the house.


Some things which will be attracted to or stick to a very strong magnet, like a rare-earth magnet, is the tape from a VCR or audio tape, a dollar bill, and the surface of a floppy disk. The reason these items will stick to a magnet is because of the very small particles of iron used in the ink of the dollar bill, and the iron oxide (ferric oxide) used as the recording medium for the VCR and audio tapes and for the floppy disk. (Please only use a tape or disk which you want to destroy!)
Let's try an experiment:
As you can see in the photo above, the tape from a VCR is attracted to the rare-earth magnet. The magnet will erase the information contained on that section of the VCR tape. I used a pencil to hold open the flip-top cover.
How about a dollar bill?
On the other two photos, you can see how the bill is attracted to the rare-earth magnet.
Take a crisp bill.
Fold it about 55% of the way along its length.
Lay it on a table as shown with the longer portion on the table, the shorter portion sticking up.
Bring the magnet close to the edge of the bill.
Watch the bill spring toward the magnet.
The reason for the attraction is that the ink on the bill has some iron particles in it.
To see what effect a magnet has on floppy disks:
Take a floppy disk and try these things with it. Be sure to record exactly what you do and your observations - the two most important parts of an experiment!
Be sure to try some typical refrigerator magnets (usually very weak since they can barely hold one piece of paper to the fridge door) as well as some stronger rare-earth magnets (neodymium-iron-boron magnets which can easily hold a stack of 20 sheets to the fridge).
Also, vary how the magnet approaches the floppy disk and leaves the disk.
For example - directly toward it, perpendicular to the plane of the disk,
or across the face of the disk, in parallel to the plane of the disk.
Perhaps a quick approach and a slow approach could also be compared.
Try the top side and the bottom side of the disk.
Even try moving the magnet around in a circle on the face of the disk.
Maybe even have a floppy held to the fridge by a magnet for a week to see if time has any affect.
If you can make an AC electromagnet, that would also be a great addition for comparison.
What kind of data will you put on the disk in order to see if the data has been corrupted?
Perhaps some bitmap images would work well, with a simple pattern of black and white squares. They are usually large files so they would cover a large part of the disk. Also, looking at the image would be a very quick and easy way to determine if any bits were changed.
Another method would be to have a large data file on the disk, and do a file compare to the original which is kept on the hard drive.
Want to try something a bit unusual? You know that several cereals claim to be "iron fortified". How do they do that? By adding some finely powdered iron (like small iron filings) in with the cereal as it is being mixed. To see this, simply do the following:
a. Get some cereal that has a large percentage of the RDA (Recommended Dietary Allowance) for iron, and pour half a serving into a bowl.
b. Add water (no need to waste the milk) to the cereal.
c. Mix up the stuff so that it is a watery slurry, not very thick.
d. Take a strong rare-earth magnet and place it into an inside-out zip-lock bag. The purpose for the bag is to keep the surface of the magnet free from iron particles which are very difficult to get off.
e. Move the bagged magnet around in the slurry of the cereal.
f. After a minute, take the magnet and its plastic bag out of the slurry, and examine it to see small, dark specks attached to the plastic at the magnet. This is metallic iron.
g. Unfortunately, our bodies can not absorb metallic iron very well, so this really does not help with our intake of iron. It would be better to take a supplementary multi-vitamin/mineral pill which contains an absorbable iron. The iron is needed to help form hemoglobin, which is the pigment in red blood cells responsible for transporting oxygen.
h. You can now turn the bag outside in and carefully remove the magnet from the zip-lock bag. This will keep the iron filings inside the bag and off the magnet.
http://www.stevespanglerscience.com/experiment/00000034
Conclusions
What did you find out? Do you now have a fairly extensive list of things magnets can and cannot attract?
Check out this information as well:
http://www.eskimo.com/~billb/miscon/miscon4.html#iron
For more information on various minerals, a great source is:
The Audubon Society Field Guide to North American Rocks and Minerals
ISBN 0-394-50269-8
Another site for obtaining various minerals is:
Problem with 2 or 3 unknown rods
Suppose you are given 2 metal rods: one is a magnet, the other is made of iron. However, both of them are painted so they appear to be the same. Their weight is the same. You are in a room with no windows so you can't tell where North is located. You have no other objects with you. How will you be able to determine which rod is the magnet and which rod is iron?
Suppose you are given 3 metal rods: one is a magnet, one is made of iron, and one is made of brass. However, all of them are painted so they appear to be the same. Their weight is the same. You are in a room with no windows so you can't tell where North is located. You have no other objects with you. How will you be able to determine which rod is the magnet, which rod is iron, and which rod is brass?
Check here for the answer.
How strong are magnets?
Typical Values
Here is a list of how strong some magnetic fields can be:
| Smallest value in a magnetically shielded room | 10^-14 Tesla | 10^-10 Gauss |
| Interstellar space | 10^-10 Tesla | 10^-6 Gauss |
| Earth's magnetic field | 0.00005 Tesla | 0.5 Gauss |
| Small bar magnet | 0.01 Tesla | 100 Gauss |
| Within a sunspot | 0.15 Tesla | 1500 Gauss |
| Small NIB magnet | 0.2 Tesla | 2000 Gauss |
| Big electromagnet | 1.5 Tesla | 15,000 Gauss |
| Strong lab magnet | 10 Tesla | 100,000 Gauss |
| Surface of neutron star | 100,000,000 Tesla | 10^12 Gauss |
| Magstar | 100,000,000,000 Tesla | 10^15 Gauss |
What is a Tesla? It is a unit of magnetic flux density. It is also equivalent to these other units:
1 Weber per square meter
10,000 Gauss (10 kilogauss)
10,000 magnetic field lines per square centimeter
65,000 magnetic field lines per square inch.
Now, 1Gauss is about 6.5 magnetic field lines per square inch.
If you place the tip of your index finger to the tip of your thumb, enclosing approximately 1 square inch, four magnetic field lines would pass through that hole due to the earth's magnetic field!
Measuring the strength of magnets
1. Hall-Effect Devices
A Hall-effect device is a piece of material which is affected by a magnetic field. By passing a constant amount of current through it in one direction, and by placing it in a magnetic field in another direction, we can measure a voltage across it in the third direction. This voltage is proportional to the strength of the magnetic field. This can be calibrated to provide a certain mV change for every Gauss of magnetic field. This effect was discovered by Edwin Hall in 1917. The materials often used today in these devices are indium arsenide or gallium arsenide. There are also superconducting devices which can measure minute magnetic fields, called SQUIDS.
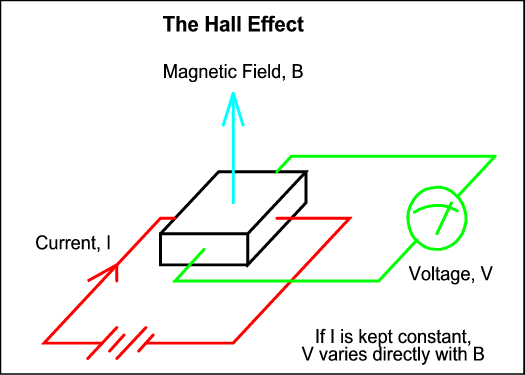
What can you do with a Hall-effect device? Build an electronic circuit which will amplify the voltage across the device and calibrate it so you can measure a voltage and translate that into a Gauss measurement. For such a unit, check out the page on building a Gaussmeter.
2. Paper clips and BB's ![]()
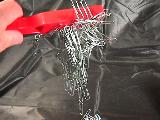
If you don't have a way to build a gaussmeter or magnetometer in order to measure the strength of the magnetic flux density of a magnet, then what else could you do? Try this.
1. Count how many paperclips or staples you can attach end to end from the north pole to the south pole.
2. Count how many paperclips or staples you can attach to one of the magnet's poles.
3. Have a big pile of paperclips or staples on the table and count how many will stick to the magnet, all over its surface.
4. Have a big pile of small (1 to 4mm in diameter, or 1/32 to 1/8" diameter) steel ball bearings or BB's in a plastic container, and count how many will stick to the magnet after you place the magnet into the middle of the pile and try to completely cover it with the BB's. Remove the magnet all covered with BB's, and take it to another plastic container to pull off and count the number of BB's that the magnet was able to attract to itself.
3. Magnetometer
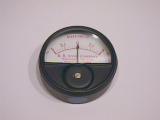
This is a meter my brother had purchased in order to insure there was no residual magnetic field left on some equipment. It would show polarity and magnitude. It was made by Anno Instruments in Indianapolis. It is very sensitive. The area at the bottom of the meter is placed near the magnetic field to be measured.
What appears to be a good book on this subject is:
The Magnetic Measurements Handbook, by J.M. Janicke
Magnetic Research, Inc.
Two rods
It is fairly easy to determine which rod is a magnet and which is not. I suspect that if you actually had those two rods in front of you, you would be able to figure it out. Here's a straightforward method to determine that.
Let's call one rod A and the other rod B. (Perhaps you could keep one in the left hand and the other in the right hand).
Next, touch the end of A to the middle of B.
If it sticks, then A is the magnet and B is iron.
If it does not stick, then B is the magnet and A is iron.
To double check this, touch the end of B to the middle of A.
If it sticks, then B is the magnet and A is iron.
If it does not stick, then A is the magnet and B is iron.
Why does this work?
In the center between the poles of a magnet, there is very little magnetic field or flux outside the magnet. All of the flux is inside the magnet itself. Because of this, iron is weakly attracted to the middle of the magnet if at all. However, the end or pole of a magnet will easily stick to any part of an iron rod.
Three rods
The solution to this is similar to the one above, but it just requires a little more work.
Let's call one rod A, one rod B, and the last rod C. Have them lined up on the floor in that sequence.
First, touch the end of A to the middle of B.
If it sticks, then A is the magnet, B is iron, and C is brass.
If it does not stick, continue.
Next, touch the end of A to the middle of C.
If it sticks, then A is the magnet, C is iron, and B is brass.
If it does not stick, continue.
Next, touch the end of B to the middle of A.
If it sticks, then B is the magnet, A is iron, and C is brass.
If it does not stick, continue.
Next, touch the end of B to the middle of C.
If it sticks, then B is the magnet, C is iron, and A is brass.
If it does not stick, continue.
Next, touch the end of C to the middle of A.
If it sticks, then C is the magnet, A is iron, and B is brass.
If it does not stick, continue.
Lastly, touch the end of C to the middle of B.
If it sticks, then C is the magnet, B is iron, and A is brass.
If it does not stick, something is wrong and you should try it all again.
Why does this work?
In the center between the poles of a magnet, there is very little magnetic field or flux outside the magnet. All of the flux is inside the magnet itself. Because of this, iron is weakly attracted to the middle of the magnet if at all. However, the end or pole of a magnet will easily stick to any part of an iron rod. Also, brass is not attracted to a magnet, so it will never stick to a magnet.
What is a magnetic field?
A magnet produces a vector field, the magnetic field, at all points in the space around it. It can be defined by measuring the force the field exerts on a moving charged particle, such as an electron. The force (F) is equal to the charge (q) times the speed of the particle times the magnitude of the field (B), or F = q*v x B, where the direction of F is at right angles to both v and B as a result of the cross product. This defines the magnetic field's strength and direction at any point.
What creates the magnetic field?
A magnetic field can be created with moving charges, such as a current-carrying wire. A magnetic field can also be created by the spin magnetic dipole moment, and by the orbital magnetic dipole moment of an electron within an atom.
What is the relationship between current flow and magnetic fields?
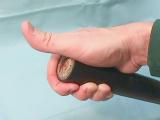
This is the Right Hand Rule for magnetic field from flowing current, and for magnetic field in a coil.
When current flows in a wire, a magnetic field is created around the wire. To visualize this, take your right hand, curl the fingers, and stick the thumb straight out. Now, point your thumb in the direction of the current flowing in the wire (using conventional current where current flows from the + end of a battery to the - end of the battery. NOTE: electrons flow from the - end of a battery to the + end, and is called electron current instead of conventional current). The direction your fingers are curved around the wire is the direction of the magnetic field around the wire. For example, if the current were coming straight out of this page toward you, your thumb would be pointing toward you and your fingers would indicate a counter-clockwise direction to the magnetic field around the wire.
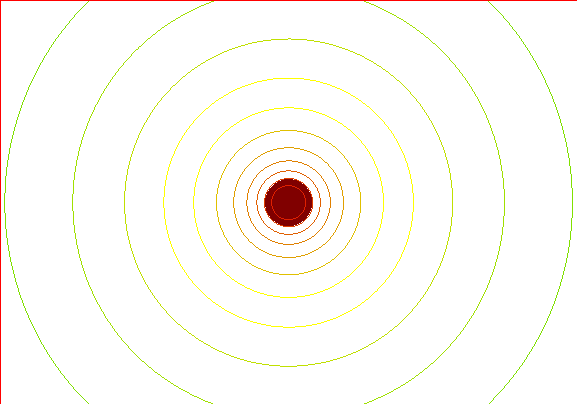
This shows the magnetic field around a wire carrying current.
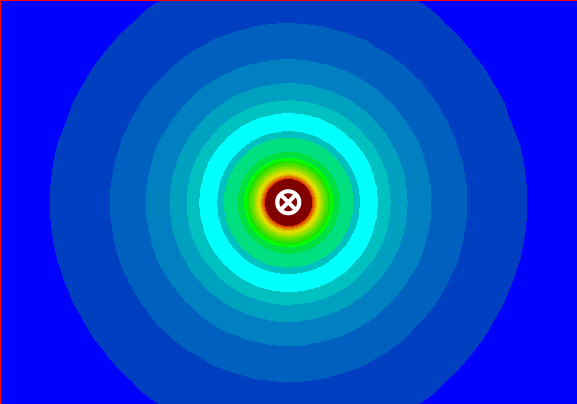
This shows the strength of the magnetic field around the wire. It is stronger the closer you are to the wire. The x inside the wire indicates that the current is flowing into the wire, away from you.
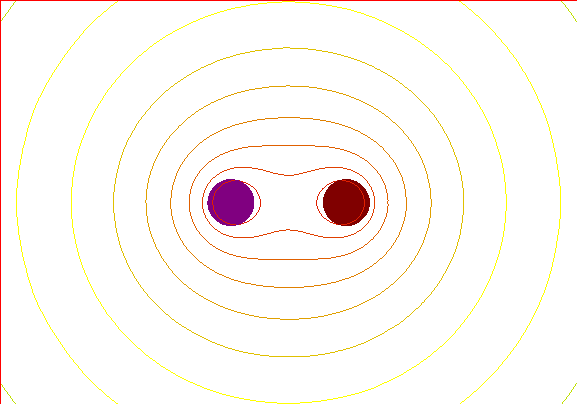
This shows the field around two wires, side by side, that are carrying current in the same direction. The wires are attracted to each other, and will pull themselves closer together.
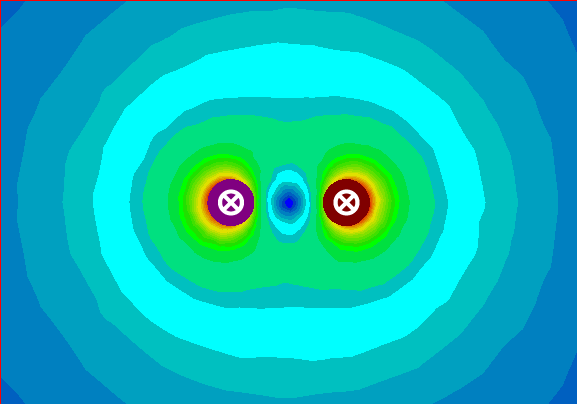
This shows the magnetic field strength around the two wires. Current is flowing into both wires. Notice how the magnetic field is slightly stronger on the side of the wire away from the other wire? This is showing that the magnetic field around a wire affects how the current flows in neighboring wires.
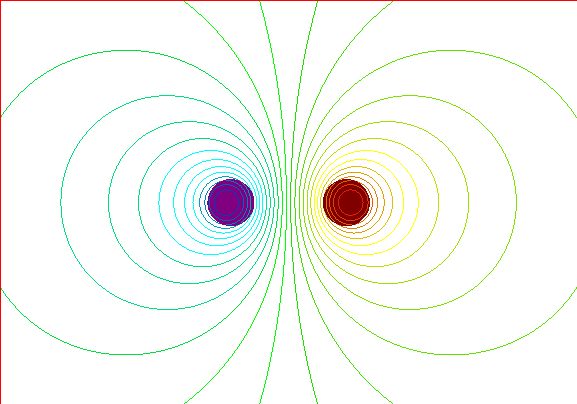
This shows the field around two wires, side by side, that are carrying current in opposite directions. The wires are repelling each other, and will push themselves further apart.

This shows the magnetic field strength around the two wires. Current is flowing into the wire on the right, and out of the wire on the left. Notice how the magnetic field is slightly stronger on the side of the wire facing the other wire? This is showing that the magnetic field around a wire affects how the current flows in neighboring wires.
If you have a coil of wire, simply curve the fingers of your right hand around the coil in the same direction as the current is flowing. Your thumb will point out of the north magnetic pole which the coil of wire will create.
By convention, we state that the magnetic field has a direction associated with it, such that the field exits the North end of a magnet, flows through the air or other materials nearby, and re-enters the South end of the magnet. Inside the magnet, the field flows from the South back to the North.
In summary, current flows from + to - of a battery, and magnetic fields flow from the North to the South of a magnet.
What do we know about magnetic field lines?
Magnetic field lines are a way to visualize the magnetic field. When drawn, the distance between them is an indication of the strength of the field. The closer they are, the stronger the field. For example, the number of lines per square centimeter is a measure of the strength of the magnetic field. Specifically, 1 Gauss is equivalent to 1 magnetic field line within 1 square centimeter. Also, the direction of the tangent to the field line is the direction of the magnetic field at that point and is the direction a compass would point..
What are magnetic fields made of?
A tremendous amount of research has gone into the area of elementary particle physics - the study of the basic building blocks of all the matter we know of. We used to think that electrons, protons, neutrons and photons were all there was. However, we then discovered a host of other particles which make up the protons and neutrons. Today, we know of 12 particles and 4 electroweak forces and 1 strong force. They are:
| Fermions (matter carriers) | Bosons (force carriers) | ||
| Leptons | Quarks | Unified Electroweak | Strong |
| electron neutrino | up | photon | gluon |
| electron | down | W- | |
| muon neutrino | charm | W+ | |
| muon | strange | Zo | |
| tau neutrino | top | ||
| tau | bottom | ||
So, how does one magnet feel the presence of another magnet when they approach each other? I don't think physicists really know the answer to that. They know that the electromagnetic field is actually made of an enormous number of photons, but do virtual, massless photons make up the magnetic field, and how does one field affect other magnetic fields at a distance, and does the magnetic field travel at the speed of light like gravitational waves? Perhaps you will be the one to discover some of these answers.
Visualizing magnetic fields
How can I visualize the magnetic field? ![]()
At first, this seems like an impossible task since you can not see magnetic fields. However, there are several ways to do this.

1. The easiest way is to take a small compass and move it around within a magnetic field. The direction the compass points is tangent to the curve of the magnetic field line at any location. A nice tool for this, using a small bar magnet instead of a compass is the following I got from Arbor Scientific.
2. The next most popular method is to place the magnet (or electromagnet) under a piece of paper or light cardboard. You then sprinkle iron filings on top of the paper, tap the paper a couple of times, and watch the small filings line up along the field lines. You could spray clear Krylon over the pattern, keeping it in place. It is also possible to get tin-plated iron filings. These won't rust. Or, get a plastic box with iron filings in it, and place a magnet under the box. They will trace out the field lines. A variation of this is to use black sand which is simply very small particles of magnetite. Another variation, which isn't as messy, is to use the product, also from Arbor Scientific, called Mysterious Magnet Tube to see the iron filings surround the magnet in the middle. The iron filings stay contained within the cylinder. There are some other variations of this on the market, including having the iron filings suspended in oil.
3. Another method is to take your stapler, make a bunch of staples, and use them like big iron filings. Sprinkle them onto a piece of paper, like you do with the filings, or let them hang around on the magnet itself. A variation of this is to use BB's to do the same thing.
4. The most accurate method is to use a software package that will calculate the field in the space around a magnet or electromagnet and plot the field lines or display shaded areas corresponding to the strength of the field.
Ansoft Corporation has a great software package which can simulate the fields and forces surrounding permanent magnets and electromagnets. The following diagrams show the results of some simulations created using the Ansoft Maxwell 2D Field Simulator program. (Maxwell is a registered trademark). Check their web site to obtain your own, FREE Student Version of this program!!!
Here is a pdf of a Basic User Manual I created to help you use this Student Version. (about 825kB)
Install Adobe Reader to be able to read this file. ![]()
Helmholtz Coils or Assembly ![]()
A Helmholtz assembly is actually a specific configuration of two coils. Each coil has the same radius. Also, the coils are placed parallel to each other. The distance between the coils is the same as the radius of each coil. What makes this assembly special is that if each coil has the same current flowing through each other (by connecting them in series) and the direction of current is the same, the magnetic field within the center of the two coils changes very little as you move along the center line from one coil to the other. This is a way to create a volume with a fairly constant magnetic field throughout that volume of space.
This shows a cross section of the two coils and the field they create. The upper right dot and the lower right dot are one coil, the upper left dot and the lower left dot are the other coil. Current enters each coil at the bottom and exits at the top. The spacing between the field lines in the middle section is fairly uniform, meaning that the field strength is very constant in that area. You can easily make something like this, and test the field strength in the middle as you vary the spacing between the coils, and vary the position of the field strength sensor.
More can be done with this. If a magnet is placed within the center of the Helmholtz assembly and rotated half a turn, the response will tell you the magnetic moment. A good reference on that is here.
There are some great articles describing how to build a supersensitive magnetometer using such an assembly, especially for tracking changes in the earth's magnetic field due to magnetic storms on the sun. Check out:
http://www.eden.com/~rcbaker/magnetometer.htm (dead link)
http://www.scientificamerican.com/2000/0300issue/0300amsci.html (dead link)
http://www.netdenizen.com/emagnet/ for details on calculating the field within a Helmholtz coil assembly
Halbach Array
A Halbach array is a unique arrangement of permanent magnets used to achieve a fairly uniform magnetic field within a volume of space, similar to the idea behind the Helmholtz coils assembly. It can also be an arrangement of permanent magnets used to achieve a stronger field on one side than the other, often found in ferrous metal collectors.
Compare the following.

The diagram on the left is for reference. The arrow within the magnet points to the North pole of the magnet, since this is the direction the magnetic field flows within the magnet. The diagram on the right shows what the magnetic field would look like.


The diagram on the left shows the arrangement of five permanent magnets. The diagram on the right shows the field that this arrangement will create. Notice how the field is much stronger on the top of the assembly than on the bottom of it?
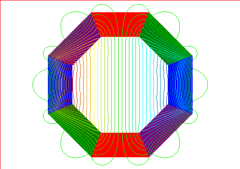
The diagram on the left shows the arrangement of eight permanent magnets in an octagon. The diagram on the right shows the field that this arrangement will create. Notice how uniform the field is within the assembly (all of the field lines are just about equally spaced apart), and how weak the field is outside of the assembly.
For more information, check sites like these:
Magnets, Markets, and Magic Cylinders, by Michael Coey and Denis Weaire
A Permanent-Magnet Based Vector Vibrating Sample Magnetometer, by J.M.D. Coey, David Hurley, and Farid Bengrid
Design of an electrical machine with integrated flywheel, by Colotti Alberto, and Reichert Konrad
Can I make one big North pole?
In other words, can I make a monopole? As the name implies, a monopole is a magnet that has just one pole - either a North pole or a South pole. It doesn't matter which one, but the interesting thing is that it only has one. An equivalent in the electrical world would be an electron or proton - a particle that has just one charge (negative for the electron, positive for the proton).
I decided to try this using Maxwell, the free student version you can use to try interesting experiments with magnets and electromagnets. The idea would be to do something like gluing a bunch of magnets onto the surface of a ball (perhaps a golf ball or a baseball) in such a way that the North pole of each magnet is facing outward. This way, you would have one ball, completely covered with magnets. With all of the North poles facing away from the surface of the ball, I would have a monopole, right? Why is this so tough?
What I did was to design a wedge shaped magnet, magnetized with its North pole facing out along its wider face and its South pole facing in along its smaller face. The outer face is flat, and I made the inner face round (doesn't make any difference either way). Each one is 45 degrees of a circle, so that it takes 8 of them to make a full circle. All I have to do is place them in a circle with some space between them, and then start squeezing them closer and closer together until there is no space at all between them and I have a solid circle of magnets with North on the outside and South on the inside. OK?
Watch this: Magnets in Motion 12 (then click on the Back button of your browser to return here)
What happened? As long as there was some space between the magnets, the field lines would exit the outer flat surface of the magnet, go around the sides of it and enter the magnet at the South end. As the magnets got closer, the space for the lines got tighter. What this would look like on the outside is that there are North poles, because that's where the fields were coming from, with South poles in between them, because that's where the fields were going back in between the cracks. As soon as there was no space between the magnets at all, the fields disappeared! How can that be? It has to! Why? Remember, a magnetic field is like a rubber band. It forms a complete loop. It comes out of the North pole end of a magnet, loops around in the air or other things, and goes back into the South pole of the magnet. It then will travel through the magnet to the other end where it can pop out of the magnet again at the North pole - around and around. They don't cross each other, they don't end somewhere or start somewhere. If it can't form a loop, it can't exist. As far as anyone knows, magnetic fields only exist when current (electrons or protons - something with a charge) is moving. If the current stops, the field decays to nothing. A changing field can create a current, a moving current can create a field. That's how generators and motors work.
Here's another animation showing part of the previous one: Magnets in Motion 13 (then click on the Back button of your browser to return here)
What this is showing, is that as far as anyone knows, monopoles do not exist except in science fiction.

|
 | |
| |  |
 | |


1 comment:
Great blog, Thank you for sharing this useful information with us. injection ndfeb magnet
Post a Comment